
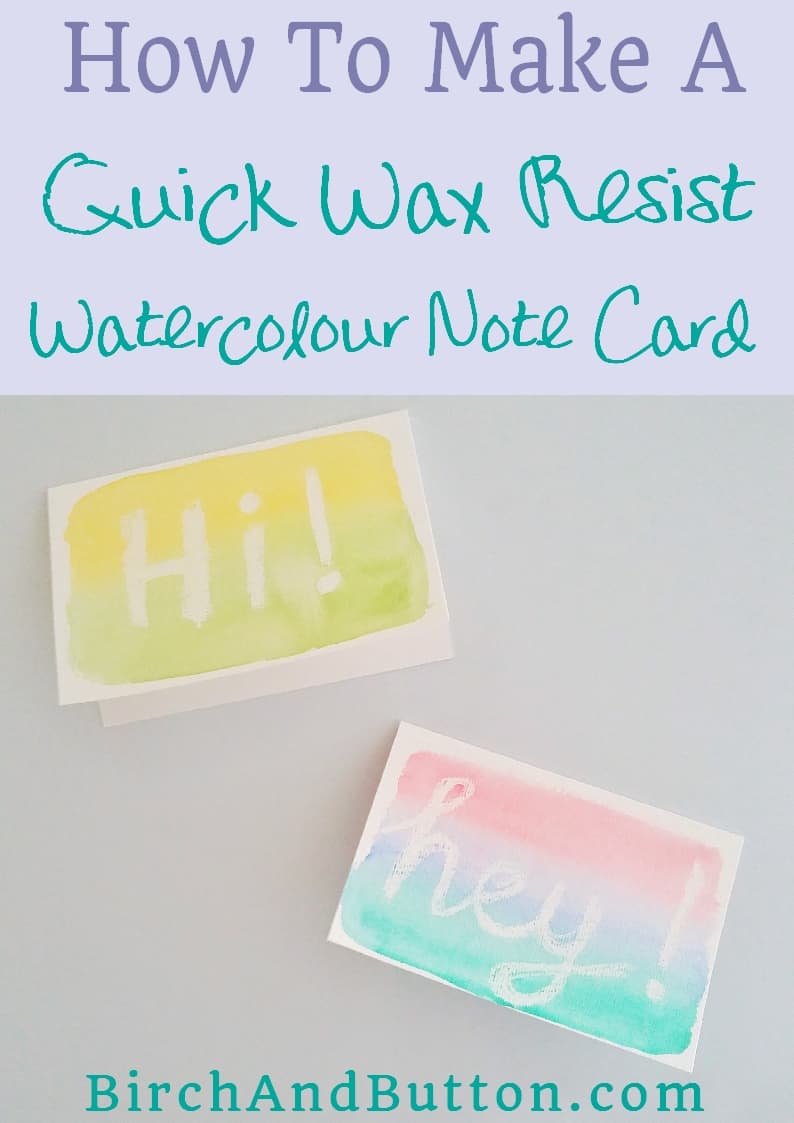
Today I’m going to show you how to make a really quick and cute wax resist watercolour note card, ideal for writing a letter to a loved one.
If you’re not familiar with wax resist, it’s a great way to add a simple design to a card while also incorporating the beauty of watercolours.
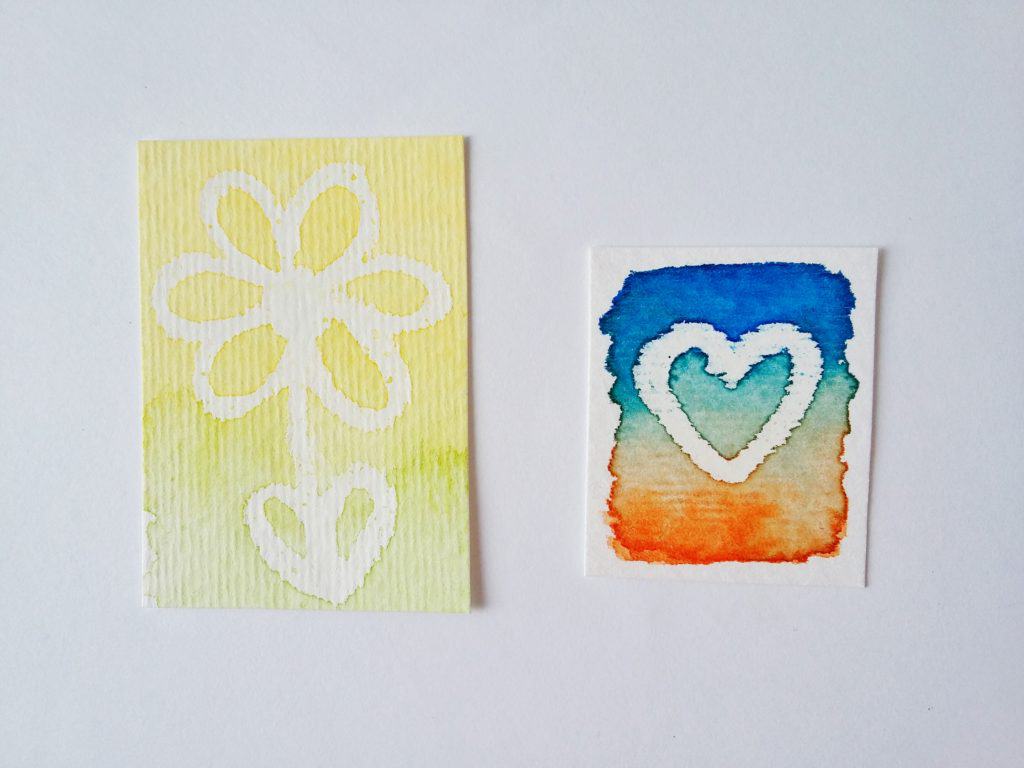
You start by drawing a design onto plain paper with a white wax crayon. Then you apply paint to the page. The crayon lines act as a barrier and prevent the paper absorbing the paint, leaving crisp white lines.
I chose to write a short message on the front of my cards, but you could also draw an image. If you choose to do this, keep the shapes simple and fairly large so you still have distinct lines when the paint is added.
Wax resist is a great effect to play around with. With all the colours and designs you could try, you could make a hundred pieces of wax resist art and end up with no two the same.
Related article: DIY Striped And Marbled Notecards
Sign up for my monthly emails of creative tips, tutorials and DIYs and get 31 free creative prompts!
You can unsubscribe at any time
How To Make A Quick Wax Resist Watercolour Note Card
Supplies needed
- White watercolour paper (or other thick white paper)
- A white wax crayon
- Watercolour paints (I used my Winsor & Newton Cotman Watercolour Paint set)
- A paintbrush
- Water
Step one
Fold the watercolour paper in half to make a note card.
I chose to fold it so the crease is at the top, but you can also fold it so the crease is at the side – it’s entirely up to you.
Step two
Use your white crayon to write a message on the front of the note card. I like to make the letters quite thick so they stand out well, so it’s probably best if you keep the message fairly short. I wrote “hey!” on one card and “hi!” on another.
If you have trouble seeing the letters against the white paper, tilt the note card towards a window. The light will shine off the wax and make it more visible.
Step three
Wet your brush and apply a little water to the area where you want to apply the paint. I chose to paint a rectangle shape to cover most of the front of the note card but other shapes would work too.
Step four
It’s now time to apply the paint to the page. You may decide to just use one colour, in which case you just need to take a little paint on the brush and apply it to the page where you brushed the water. Start off with the paint fairly dilute, then you can build up to a darker colour if you like.
If you want to use two or more colours, start at the top with one colour and brush horizontally, back and forth, moving the brush down until you reach the middle of the design.
Then rinse your brush, pick your next colour, and work from the bottom upwards. Blend the two colours where they meet in the middle with a damp brush but don’t overwork it.
Leave the design to dry.
Step five
If any tiny droplets of paint have dried onto the wax letters, dampen a piece of kitchen paper and wipe them off carefully.
Your note card is now ready to write and make someone you love smile!
Sign up for my monthly emails of creative tips, tutorials and DIYs and get 31 free creative prompts!
You can unsubscribe at any time
About Stacey

I’m Stacey and I’m a blogger, abstract artist and freelance writer. My aim is to help busy people feel inspired and get more creative with tutorials, hints and tips.
I live in Cardiff with my partner and dog, and in my free time you’ll find me hiking, reading, painting or sampling a craft beer or two.