If you love painting but have no idea exactly how to paint the sky with acrylics, let me help! In this blog post I’m sharing three techniques for painting very different skies.
The sky can seem like a tricky thing to paint, but it doesn’t have to be. The weather, season and time of day play a massive part in the colours present.
If you’re trying to convey a particular type of weather or mood in a painting, the sky can make it or break it.
Bear in mind today’s post isn’t doesn’t really cover clouds. I’m intending to write a post in the near future about different techniques for painting clouds. (I’m thinking about those white fluffy ones, which aren’t actually that white when you really look at them!)
You’ll notice, though, that the method for painting a stormy sky incorporates a technique to create heavy, dark clouds.
I’m also not going to be too exact with which paint colours to use. I want you have a go at the painting techniques rather than getting hung up on using the “right” paint colours.
That way, if you don’t have a certain shade of blue, or you use craft paints that aren’t named the same as my paints, it really doesn’t matter.
So let’s take a look at how to paint the sky with acrylics.
Sign up for my monthly emails of creative tips, tutorials and DIYs and get 31 free creative prompts!
You can unsubscribe at any time
1. Clear and bright
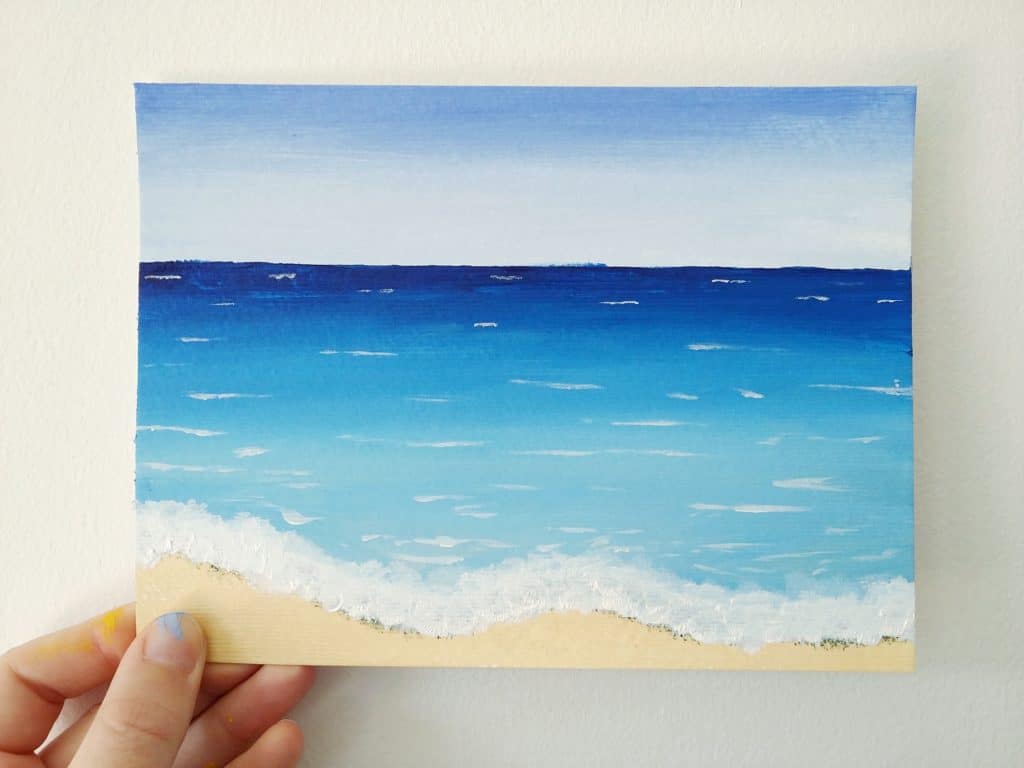
This is the kind of bright blue sky you might see on a summer’s day, such as in this simple acrylic beach scene.
It’s super easy to paint with just some ultramarine (or any other blue that’s more red-toned than green-toned) and white.
- Working with a damp brush, mix a tiny bit of white with some blue
- Starting at the top of your page, paint long strokes across it. Keep the strokes as horizontal as possible
- As you work towards the horizon, make the blue more and more pale by adding increasing amounts of white. The blue at the horizon should be much paler than it is at the top of the page
This technique should give you a graduated sky. It’s not a problem if it’s a little streaky, as it’ll just look more realistic that way. Nature is very rarely “perfect”!
2. Driving rain
It’s deceptively easy to paint a sky filled with driving rain, and this is a very freeing technique to use.
This is a great one if you’re too impatient to thoroughly mix your paint colours, since we actually want it to be pretty streaky!
The only thing you need to watch is the angle of your brushstrokes. They should all stay roughly the same to give the effect of rain.
If you start off painting diagonally across the page, make sure all your strokes are diagonal to give the effect of heavy, blustery rain.
Greys and blues work really well for this technique, although I’d encourage you to play around with your colour combinations to create different effects.
All you need to do is pick up a little blue, some white, and a tiny bit of black and streak it across the page without mixing it first. Try not to paint over and over the same section because doing that will result in the colours mixing together.

3. Stormy
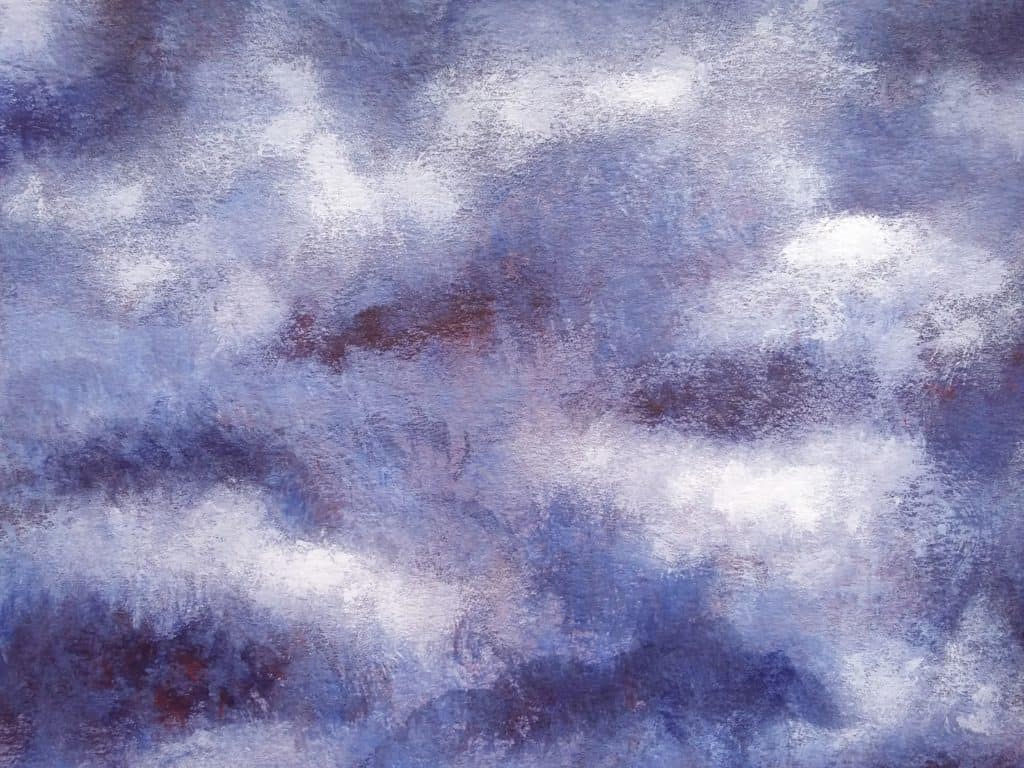
It takes a little bit of time to build up the layers with this technique, but it’s so worth it in the long run for the dramatic sky it creates.
The important thing is not to rush it, and to let each layer dry before painting the next. Thankfully, since we’re using acrylic paint, that doesn’t take too long.
When you’re painting the layers, gently touch the brush to the paint so you hardly pick any up. Using only a tiny bit of paint is what creates that barely-there texture.
Finally, make sure you use a brush you aren’t too attached to. We need to scrub the paint into the page and the brush could suffer. This is a technique for your worn-out brushes and certainly not any expensive ones!
- Start by working out how much of the page you want to be sky. Paint it all a mid purple-grey colour and let it dry
- Now it’s a case of using a stiff, dry brush to build up the cloud layers. Mix up a dark purple-grey and begin scrubbing it on at random to create dark spots in the cloud
- When you’re happy with the coverage of the dark colour, make sure it’s dry then add a little white and paint another layer
- Keep layering up like this, each time with a lighter colour, until you’re completely satisfied. The brightest highlights should still have a little of the purple-grey in them, rather than being pure white
Generally, clouds are darker on the bottom and lighter on the top, so use the highlight sparingly to help shape your clouds.
And there you have it! Let me know in the comments below how you get on using these methods.
Ready to learn more about acrylic painting? Check out this article: Acrylic Painting Terms: A Glossary For Beginners!
About Stacey

I’m Stacey and I’m a blogger, abstract artist and freelance writer. My aim is to help busy people feel inspired and get more creative with tutorials, hints and tips.
I live in Cardiff with my partner and dog, and in my free time you’ll find me hiking, reading, painting or sampling a craft beer or two.

