
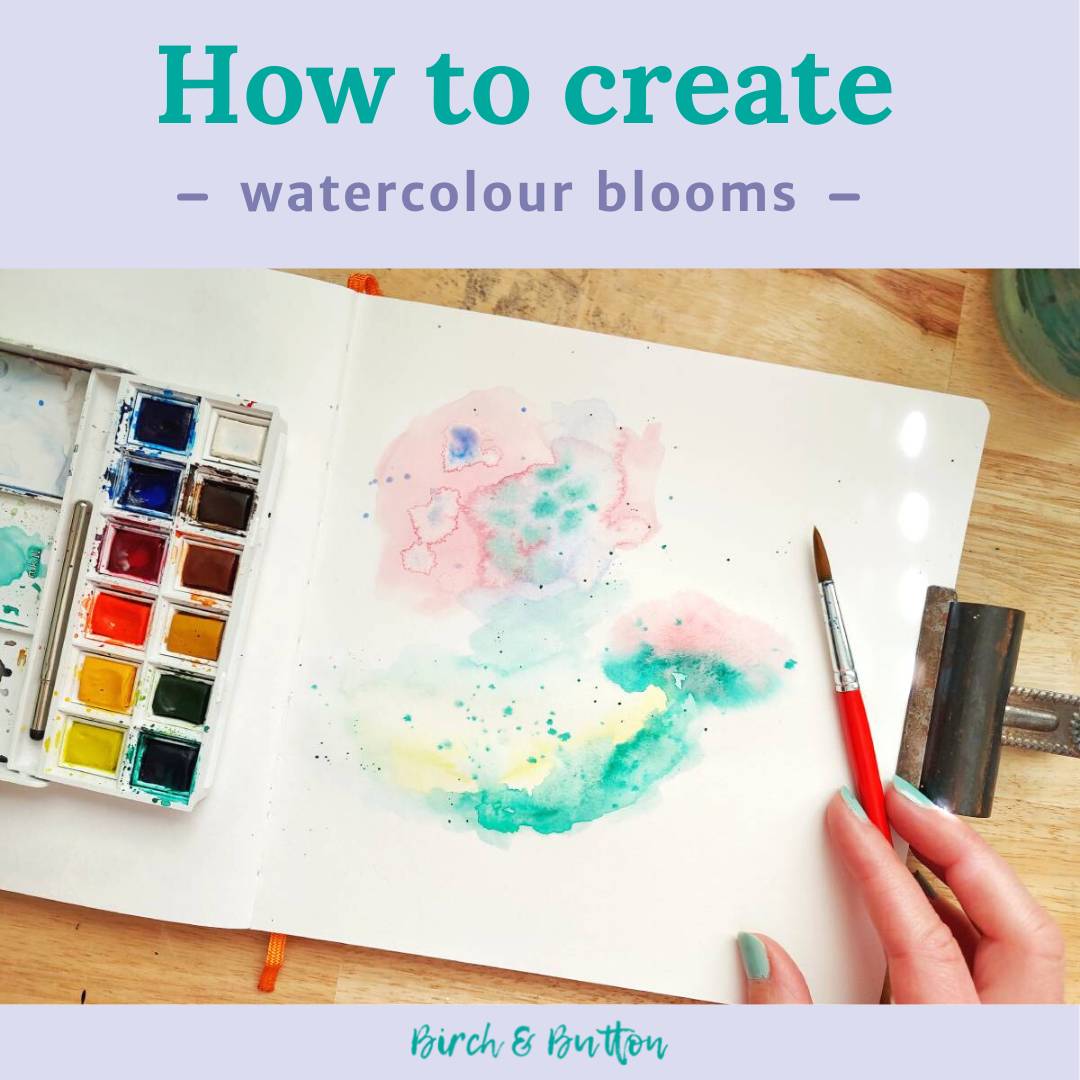
Watercolour blooms can create a beautiful effect in your artwork and there are so many different ways you can use them. Read on to learn how to create this effect and read some hints and tips for making it easy.
If you’re painting with watercolours and you accidentally paint too close to a damp patch on the paper, the colours can bleed together in a very frustrating way. This is essentially what a watercolour bloom is.
As annoying as this effect is when you didn’t mean to do it, it makes for some very beautiful artwork when you sit down with the intention of doing it.
You can use this technique for mingling watercolours in so many ways:
- As an art journal background
- To create abstract trees or flowers in a painting
- As the background to a hand lettered piece
- In a collage
- To make watercolour gift tags
- On a notecard
- To make your own gift wrap
Sign up for my monthly emails of creative tips, tutorials and DIYs and get 31 free creative prompts!
You can unsubscribe at any time
Tips to make creating watercolour blooms simple
It’s surprisingly easy to achieve this lovely effect, but I have a couple of hints to make it go more smoothly.
- Make sure you work fairly quickly. The paint should still be wet when you add additional colours as that’s when they’ll bleed together.
- Bear in mind that the wetter paint will bleed into the drier paint. You don’t want to paint two colours of a similar wetness as they won’t bleed so well.
- Generally, the wetter the paint, the further it will travel. Experiment with the amount of water you add to the paint to alter the effect and how far the paint travels.
- Bear in mind that it’s very tricky to control this effect 100%. So if you’re a control freak, you’ll need to accept that before trying this technique! (I learnt this the hard way…!)
- Depending on what you’re trying to achieve with your watercolour bloom art, you could experiment with multiple colours, repeat the same two colours, or even work with variations of one colour.
- Another way of using this effect is to paint a wash in one colour, allow it to dry slightly, and then drop clean water onto it. Each water droplet will create a pretty round bloom.
How To Create Watercolour Blooms In Your Artwork
Supplies needed
- An art journal, sketchbook, a sheet of watercolour paper or some other thick paper/thin card (I used my Handbook Journal Co sketchbook)
- Watercolour paints (I used my Winsor & Newton Cotman Watercolour Paint set)
- A brush
- A jar of water
Step one
Firstly, wet your paintbrush and paint a wash (not too wet) of one colour onto the page.
Step two
Wash your brush and then pick up another colour, making sure the paint is a bit wetter this time. Paint another section of the page, allowing the second colour to touch the first while they’re both wet. The second colour will bleed into the first since it’s wetter.
Repeat this process until you’re satisfied you’ve added enough colour, then leave the page to dry.
Step three
The paper may have buckled a little due to the amount of water necessary to get the watercolour to bleed. If this is the case, close your art journal and place it under a stack of heavy books to flatten the page again.
How will you use watercolour blooms in your art journal or other artwork?

About Stacey

I’m Stacey and I’m a blogger, abstract artist and freelance writer. My aim is to help busy people feel inspired and get more creative with tutorials, hints and tips.
I live in Cardiff with my partner and dog, and in my free time you’ll find me hiking, reading, painting or sampling a craft beer or two.