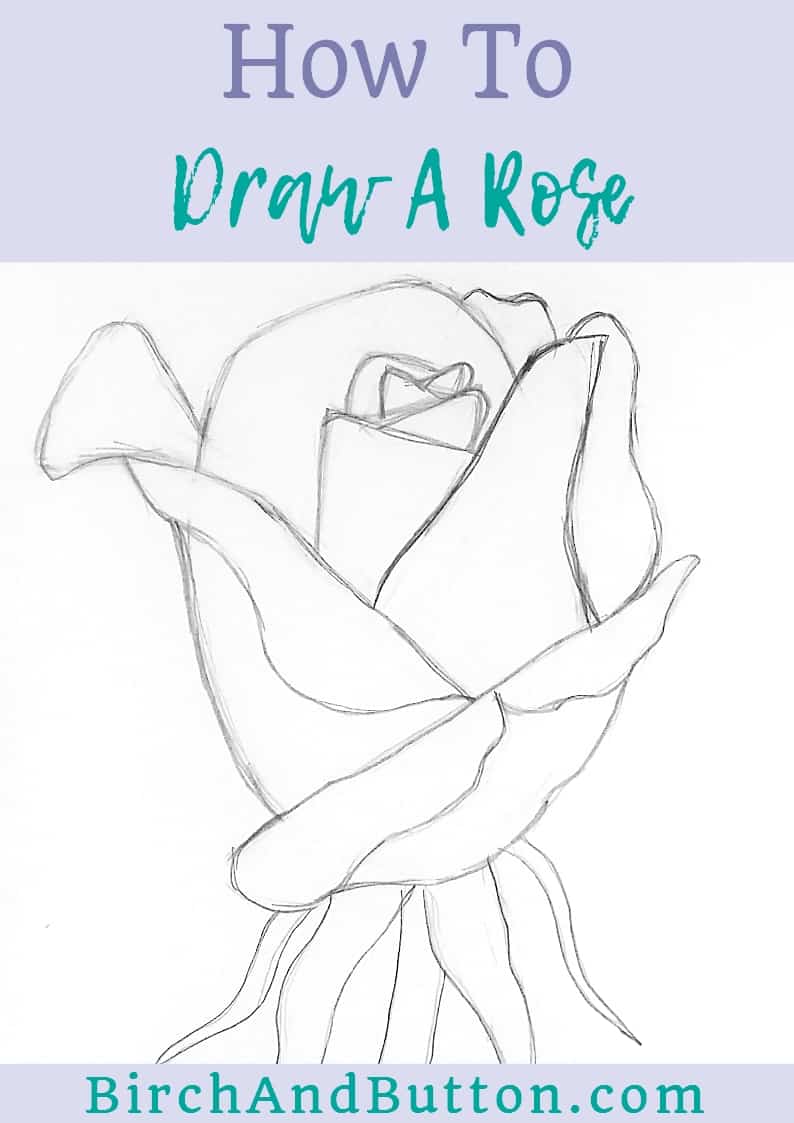
If you’d like to learn how to draw a rose, this step-by-step tutorial is just the thing. Read on to learn how to break this drawing project down into simpler stages that will make it feel much easier to do.
Depending on how much drawing you’ve done in the past, more detailed projects can seem daunting.
But when it comes to making these trickier drawings simpler and more straightforward, breaking down the thing you’re drawing into its simplest shapes and taking it one line at a time can really help.
Bear in mind I’m definitely no expert when it comes to drawing. I’ve practised A LOT, though, so I’m hoping I can help you to see the shapes and lines that make up the rose I’ve drawn for this tutorial.
If you’re interested in seeing the photo I based this tutorial on, this is it:

So grab a pencil and paper and let’s get drawing!

Sign up for my monthly emails of creative tips, tutorials and DIYs and get 31 free creative prompts!

You can unsubscribe at any time
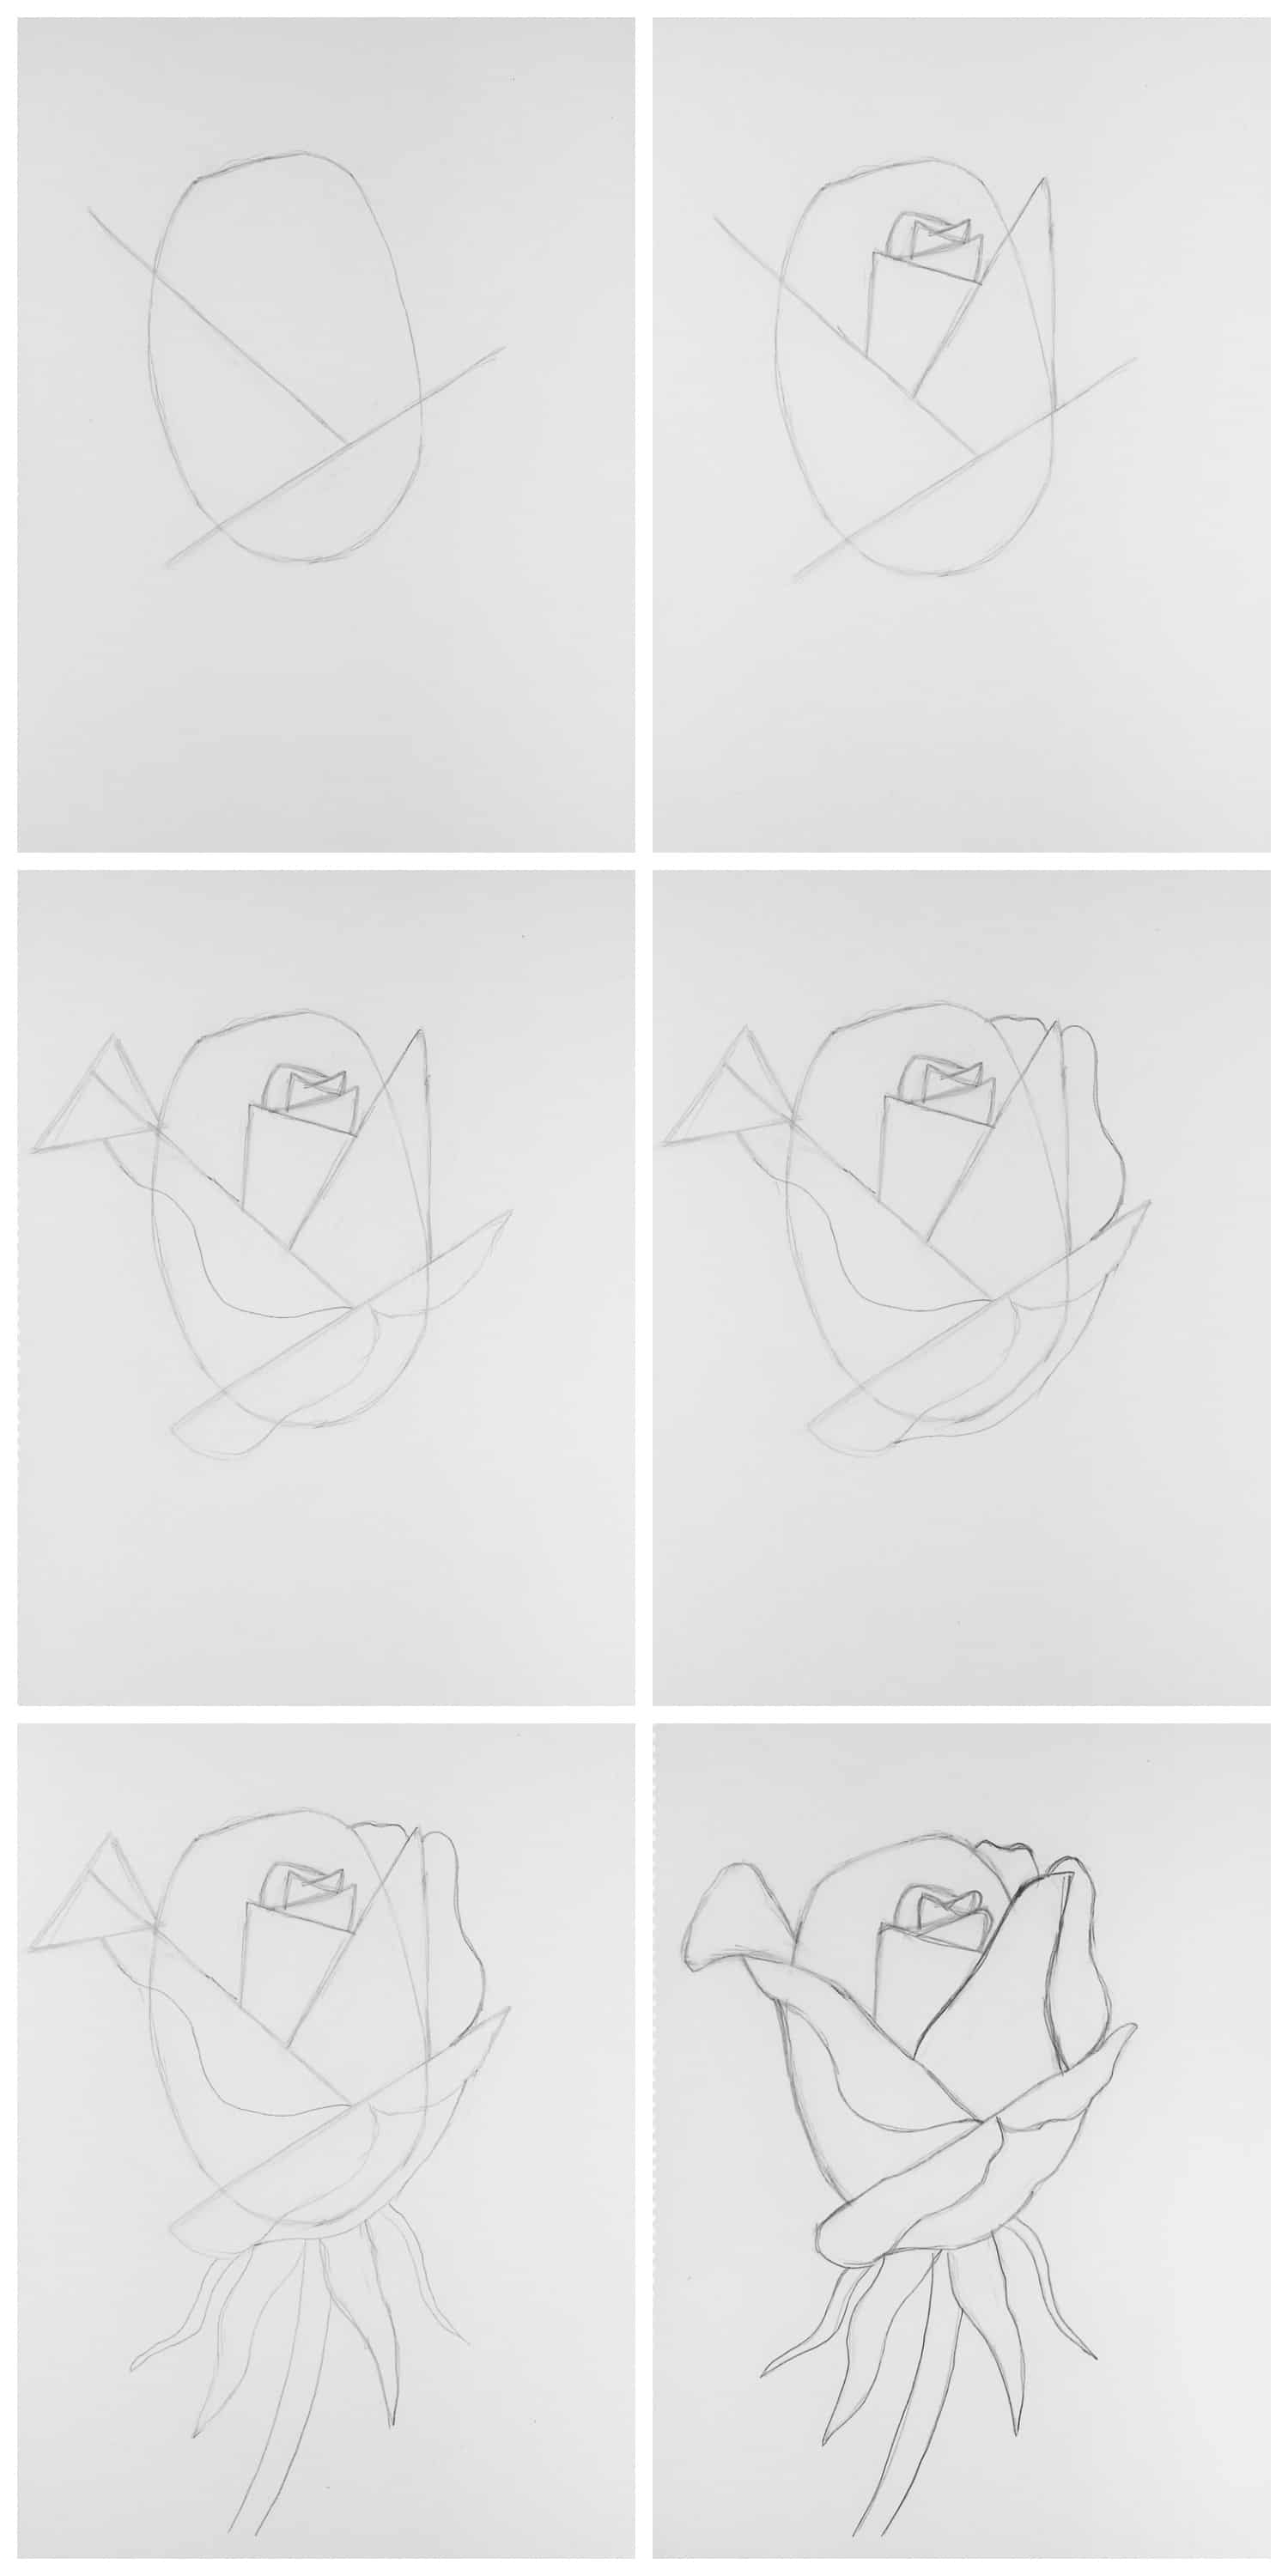
How To Draw A Rose Step-By-Step
Step one
Start by drawing an oval that’s leaning a little to the left. Give it a slightly flattened top.
Step two
Draw a line across the bottom of the oval, making it slightly higher at the right side of the oval and extending it out either side.
Then draw another line, this time across the left side of the oval. The two lines should meet just to the right of the oval’s centre.
Step three
Draw a large upside-down V to the right of centre, with the point going over the edge of the oval to the right.
Add a smaller upside-down V to the left of the larger V. Then add another two or three even smaller upside-down Vs in between the two to make the tightly coiled centre of the rose.
Step four
Now we’ll fill out the bottom petals. Draw an elongated number 3 starting at one end of the bottom line and finishing at the other.
Draw a triangle at the top end of the line cutting across the left of the oval. Then draw a curvy line from that triangle down to the other lower petal.
It looks messy at this stage, but stick with it!
Step five
Draw another petal off to the right of the larger upside-down V. The shape should be loosely like a number 3 that’s slightly tilted.
Add another curved line between this newest petal and the very first oval you drew. Then add a curved line to make the base of the lowest petal.
Step six
Add a few wobbly Vs at the bottom of the flower to make the sepals (the little green leaves that cover the bud before it opens. Don’t worry, I had to google it!). Add a stem by drawing two slightly curved parallel lines.
Step seven
Now we just need to round off some of the corners and make the lines flow together better. Round off the joins and add a bit of wobble to some of the very straight lines to make it look more natural.
And that’s how you draw a rose! Now you can draw over the outline, rub away the guidelines and colour it in if you like.
I can also help you learn How To Paint A Simple Abstract Watercolour Rose!
About Stacey

I’m Stacey and I’m a blogger, abstract artist and freelance writer. My aim is to help busy people feel inspired and get more creative with tutorials, hints and tips.
I live in Cardiff with my partner and dog, and in my free time you’ll find me hiking, reading, painting or sampling a craft beer or two.

