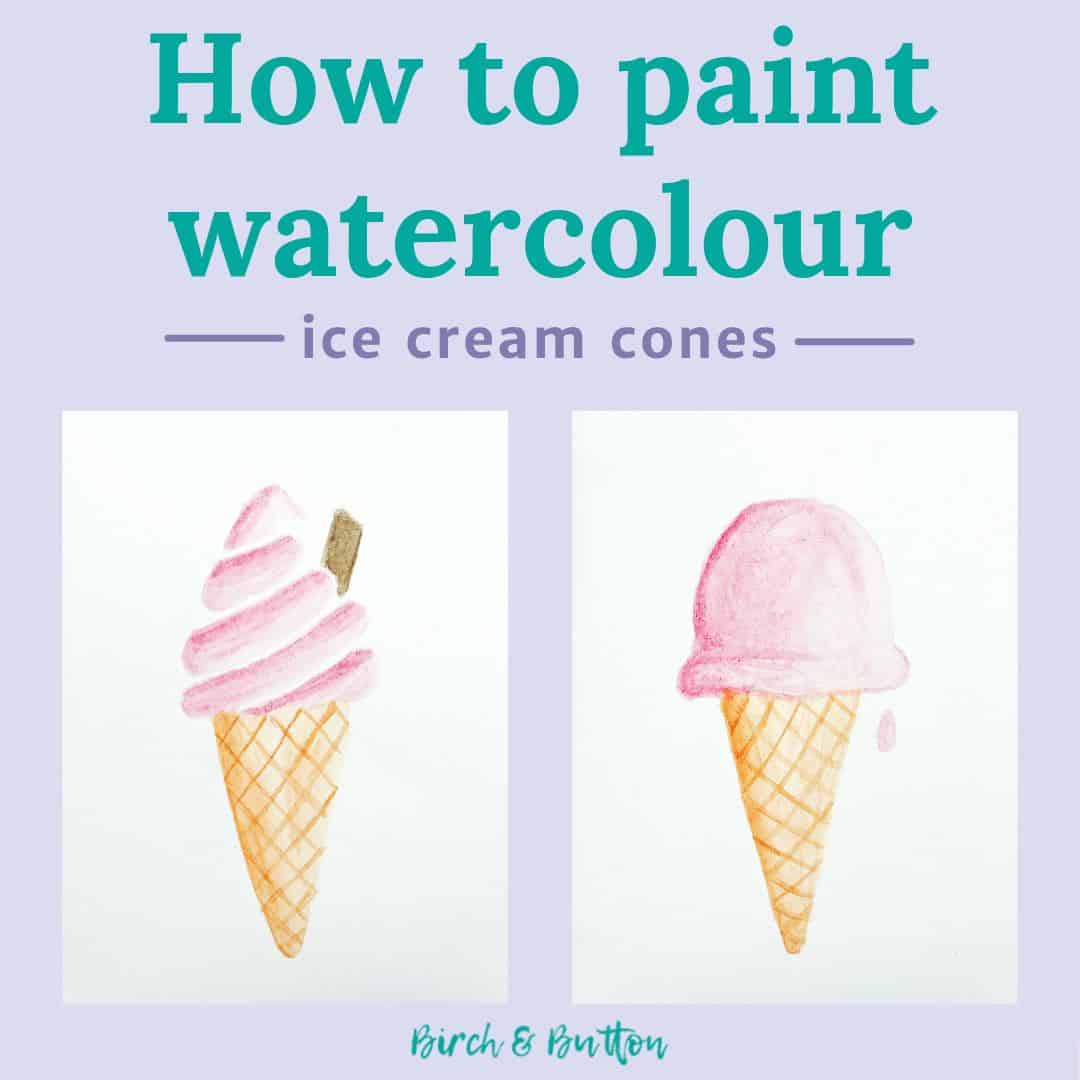
Today I’m embracing the sunshine and getting in the summer mood. In this blog post, you can learn to paint cute watercolour ice cream cones with my step-by-step instructions.
In fact, I’m actually celebrating summery things on the blog all week. Today we have a tutorial for watercolour ice cream cones and coming up on the blog on Friday is an easy beach scene painting.
Watercolour paints lend a lovely softness to these ice cream cones. I also tried making some ice cream cones with watercolour pencils, but I found it more straightforward and freeing to use watercolour paint.
But if you prefer watercolour pencils, or they’re all you have, by all means use pencils. You know the “rule” by now: use what you have!
There’s a tutorial below for a cone with a scoop of ice cream on top and also an alternative topping of swirly soft serve.
Once you know the basic ice cream, you can adapt it to suit your purposes. You can mix it up as much as you like, with different flavours of ice cream, multiple scoops, and all kinds of toppings.
There are lots of ways you could use these cute watercolour ice cream cones, but I have three ideas for you:
- I think large versions of this painting would look great framed and hung on the wall of a child’s bedroom.
- You could incorporate it into your art journal in a spread dedicated to all things summer.
- You could paint multiple ice creams on the cover of a plain notebook or journal.
- Related: How To Paint Watercolour Fruit
So let’s get into the step-by-step tutorial!

Sign up for my monthly emails of creative tips, tutorials and DIYs and get 31 free creative prompts!

You can unsubscribe at any time
How To Paint Watercolour Ice Cream Cones
Supplies needed
- Watercolour paper
- Watercolour paints (I used my Winsor & Newton Cotman Watercolour Paint set)
- A small brush (I actually used one of my Pentel Aquash water brush pens)
- Water
Step one
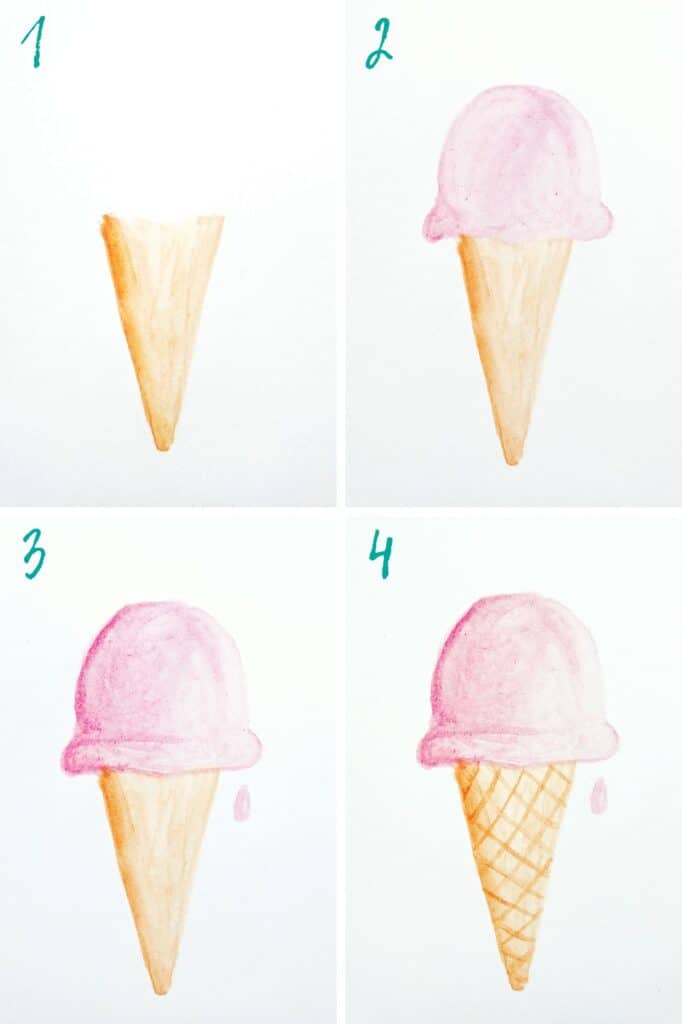
Paint a light brown triangle standing on its point. This will be the ice cream cone. Add a little extra brown to the left side to give it some shape and depth.
Step two
Pick out a colour for the ice cream — I decided to use pale pink. Paint a circle on top of the cone and add an extra squidgy bit on each side where the ice cream meets the cone.
Step three
Use curved brush strokes to darken the colour on the left side of the ice cream and give it a little more shape.
Add a drop of melted ice cream dripping off one side if you like.
Step four
Go back to the brown colour you used to paint the cone. Use the very tip of the brush to paint thin lines criss-crossing the cone.
Then your ice cream is all finished! Try mixing it up with different colours and by adding some toppings if you like.
You could also try painting the alternative swirly topping.

Alternative Swirly Topping
It’s even easier to paint a soft serve swirl topping than a scoop of ice cream. Here’s how:
- Pick up a little of the paint colour you’ve chosen for your ice cream. Start from the middle of the top of the cone and paint a stripe at a slight angle to the cone.
- Continue painting stripes at an angle to the top of the cone, leaving a small gap between each one. Make the stripes slightly shorter as you work up.
- For the top of the ice cream, paint a short, fat line straight up and end it in a flick to one side.
- Add a little more colour to the top of each stripe.
- Wash your brush and pick up a little dark brown, then paint a chocolate flake sticking out of the side of the ice cream.
So what do you think of these watercolour ice cream paintings? Fun and pretty simple, eh?
Sign up for my monthly emails of creative tips, tutorials and DIYs and get 31 free creative prompts!

You can unsubscribe at any time
About Stacey

I’m Stacey and I’m a blogger, abstract artist and freelance writer. My aim is to help busy people feel inspired and get more creative with tutorials, hints and tips.
I live in Cardiff with my partner and dog, and in my free time you’ll find me hiking, reading, painting or sampling a craft beer or two.


I struggled through a lot of “easy” tutorials before finding this one. It’s so simple and turned out great. Thank you!
Thanks so much for letting me know — I’m so happy to hear that!