If you’re in the mood to practise your drawing, try this winter woodland scene. In this blog post we’re going to be drawing and colouring a stag standing in a snowy landscape. It’s a straightforward pencil drawing that still looks really effective.
Oddly enough, this drawing was inspired by a decorated cake I saw on Pinterest! I loved the cool, wintery colours most of all. Also, stags tend to be around a lot in décor and ornaments at this time of year, so I thought a wintery stag drawing would be very much on topic!
I was initially just drawing to entertain myself, but then I thought it might make a good tutorial. It struck me that the fact that the scene is in silhouette would make it much easier to focus on drawing the actual shapes rather than worrying about the detail on the stag.
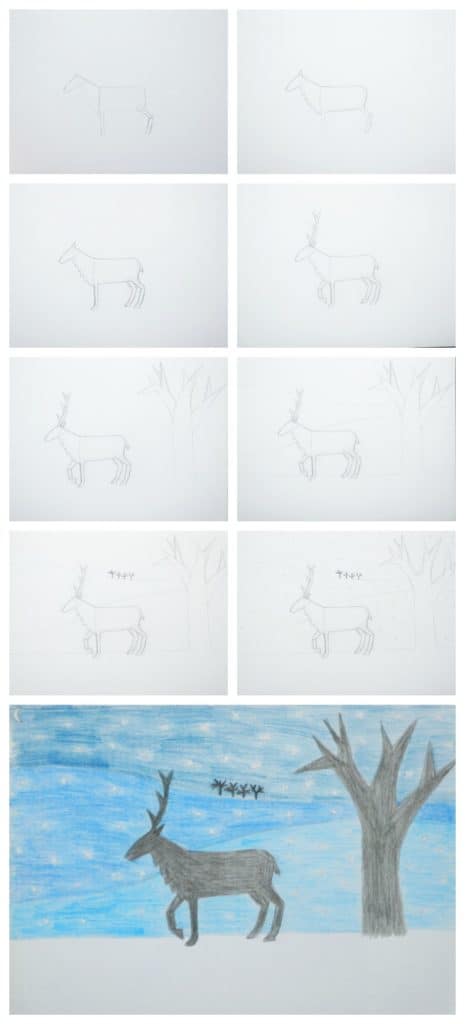
I chose to use pencils to add colour to my drawing as I wanted lots of texture and strokes in the colour but for it still to remain soft. You could use markers, watercolours or any other method you prefer.
Just bear in mind that if you intend to use paint, you’ll need to draw on heavier paper than if you use coloured pencils or another drier medium.
So let’s get into it!
Sign up for my monthly emails of creative tips, tutorials and DIYs and get 31 free creative prompts!

You can unsubscribe at any time
How To Draw A Winter Woodland Scene
Supplies needed
- A sheet of paper (mine is A5 size)
- A pencil
- An eraser
- Coloured pencils or another means to colour in (I love my Reeves watercolour pencil set for this kind of project)
Step one
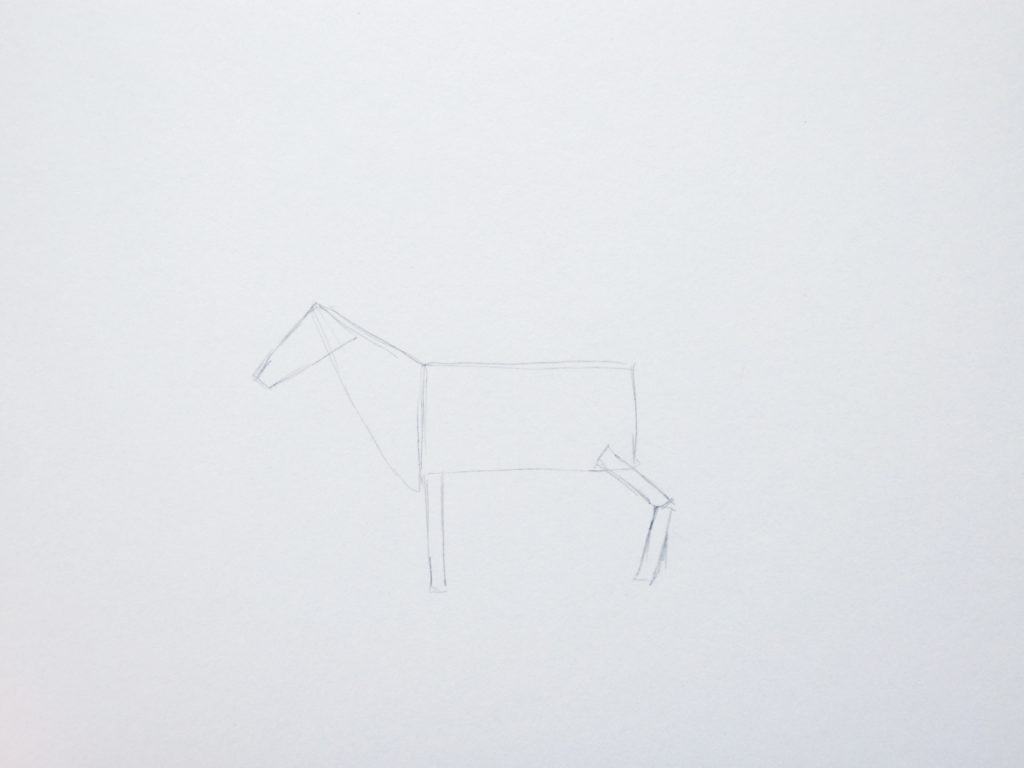
We’ll start with the stag. Draw the basic shapes shown in the photo below: a large rectangle for the body, a triangle for the neck, rectangles for the legs (one for the front leg and two for the back leg), and another sort of rectangle shape for the head (make sure it tapers down at the nose end).
Step two
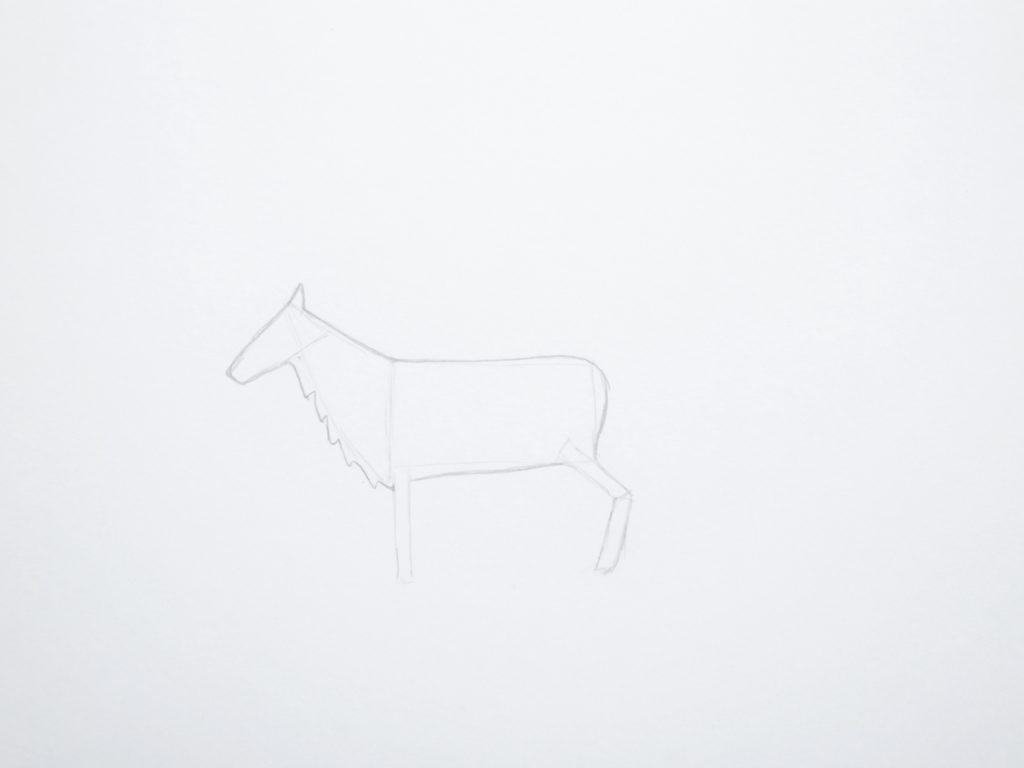
Now we’re going to round the shapes out a little. I started with an ear at the very top of the neck, then I gave the deer more of a body shape. Make the front of the neck shaggy with thicker fur.
Step three
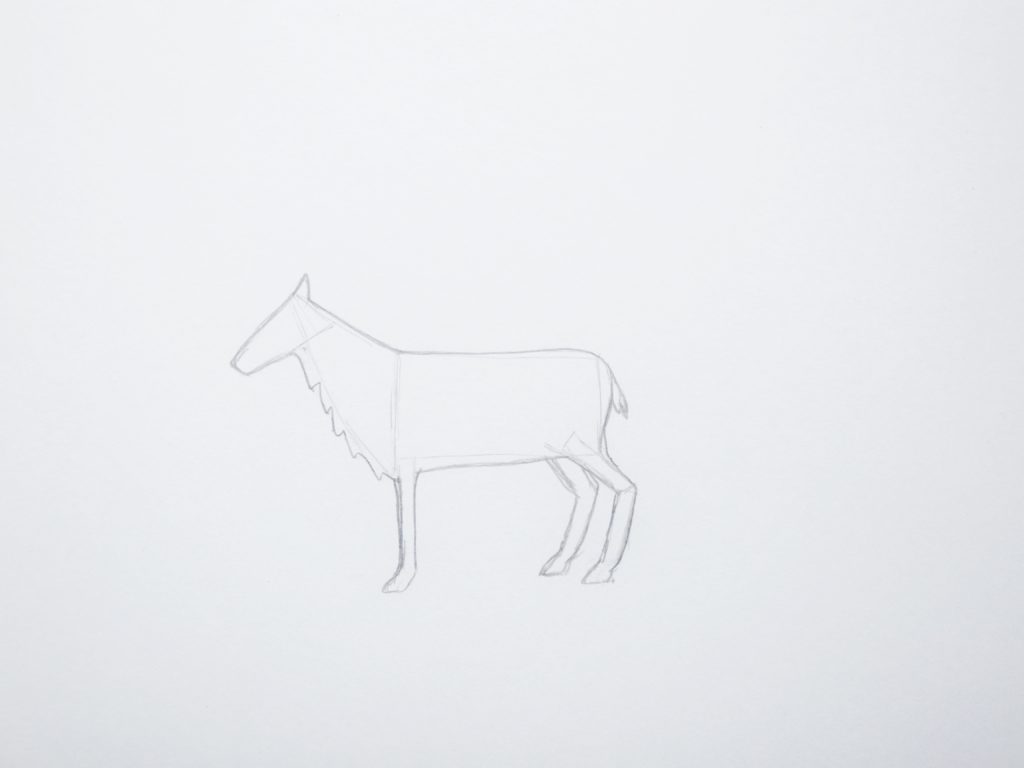
Next, add a little fluffy tail. We’ll shape the legs now too, which can be a little tricky to get spot on. Deer have surprisingly thin legs, and the back ones bend backwards. The feet are also set forward a tiny bit. At this point I added a second back leg using the same method as above.
Step four
Next we’ll add another front leg, but this one is lifted as if the stag is taking a step forward. This is formed from two rectangles and a triangle.
I also added an antler. This is formed from two curved lines that join in a point, with three other spikes at varying intervals.
I decided to move the ear at this point. As it’s going to be a silhouette it would disappear into the antler when coloured. I only drew one antler and one ear for the same reason.
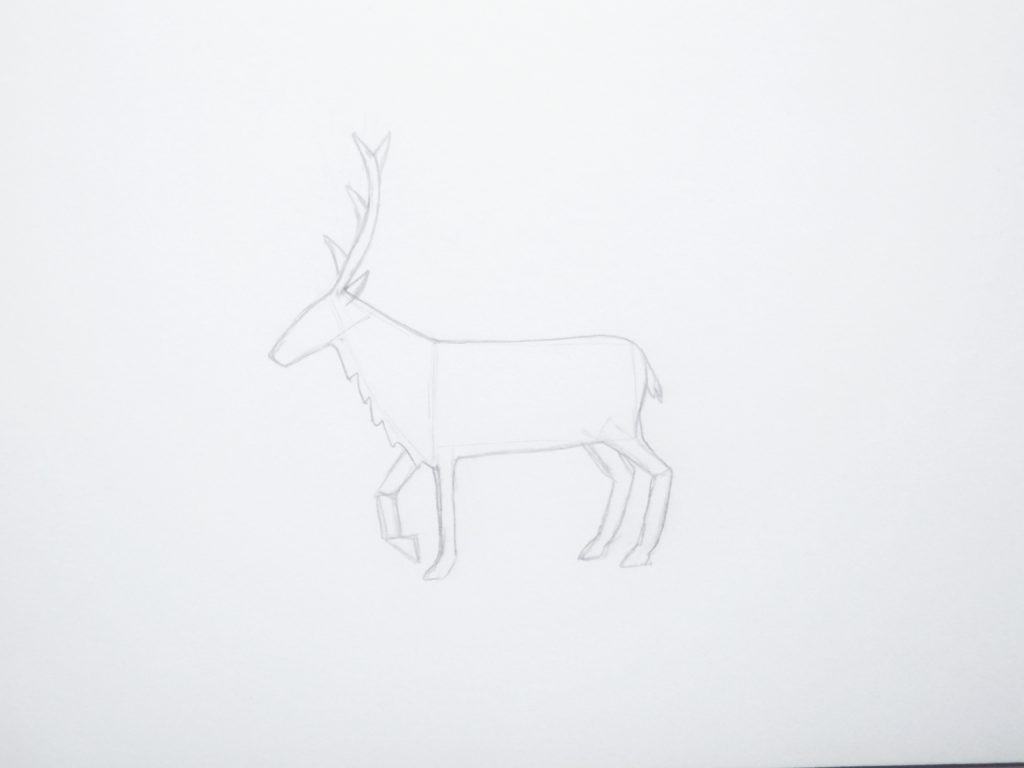
Step five
Now we’ll add a large tree next to the stag. You can see from the picture that I drew this using thin triangle shapes, which represent the tree’s leafless branches.
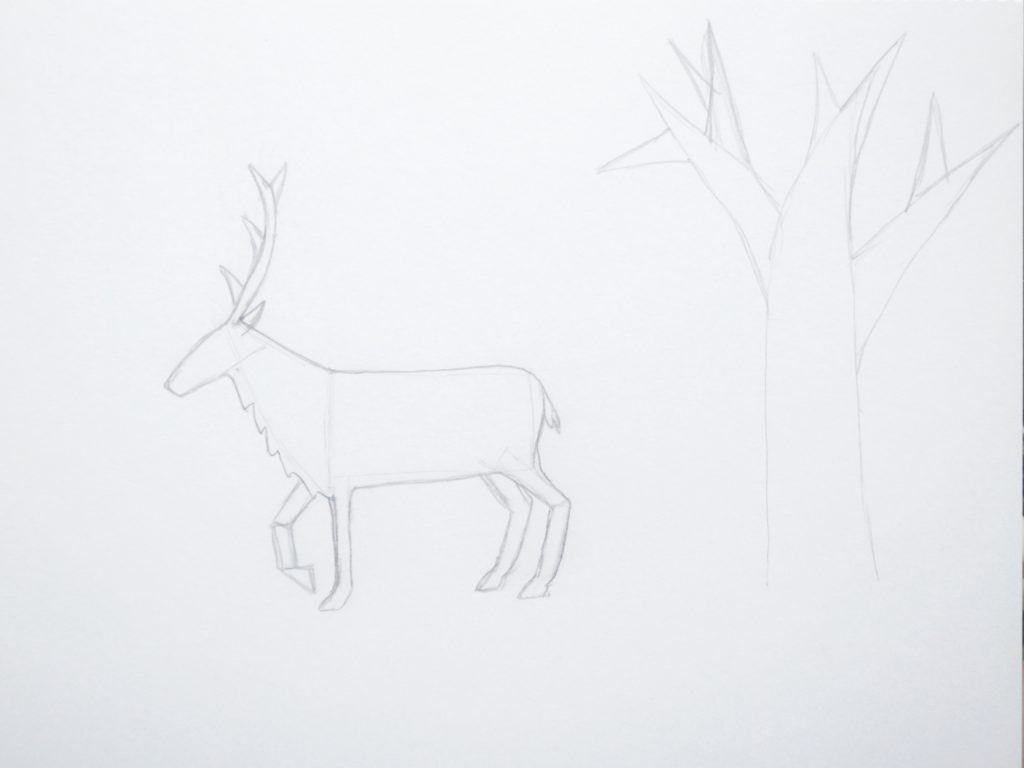
Step Six
We now need to add three lines to the drawing which will add a little perspective when the image is coloured.
The first one I drew quite near the base of the tree and the stag’s hooves, and it’s just a simple straight line.
Then I drew a slightly curved line that passes behind the stag’s neck and part of the tree.
Finally, I added another curved line that passes by the tip of the stag’s antlers and again behind the tree. This will all make more sense when we come to colour!
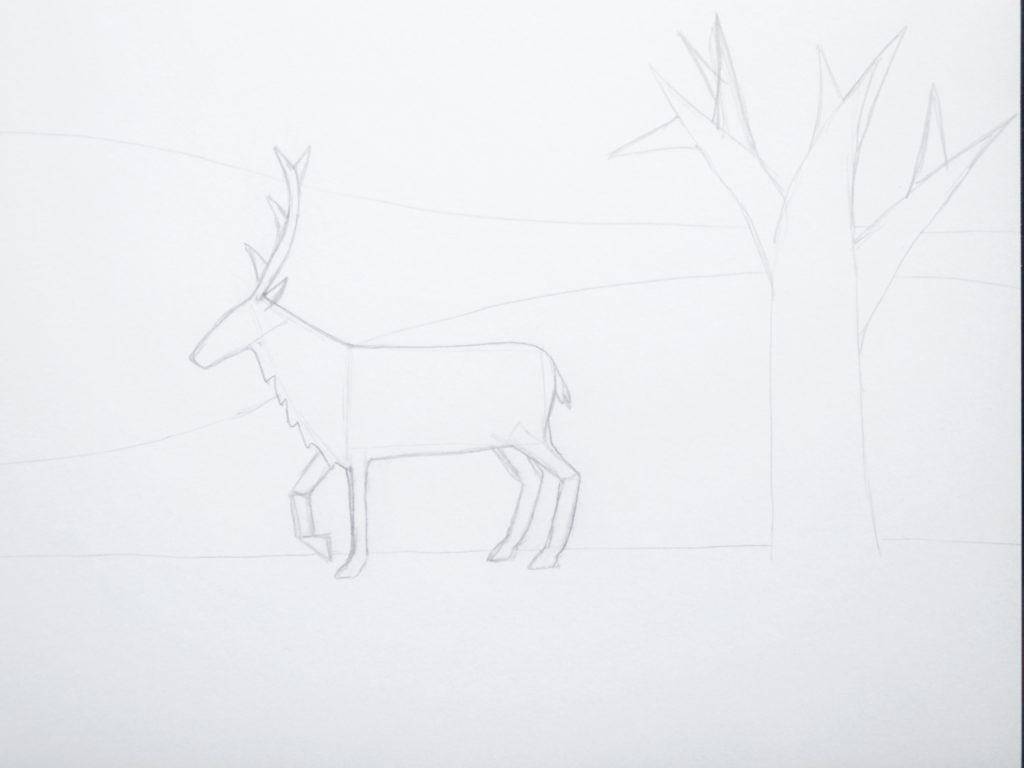
Step seven
Now we’ll add a small crescent moon in one corner of the page.
I also added some tiny, distant trees on the topmost curved line, just with some dark pencil lines that are drawn to look quite twiggy.
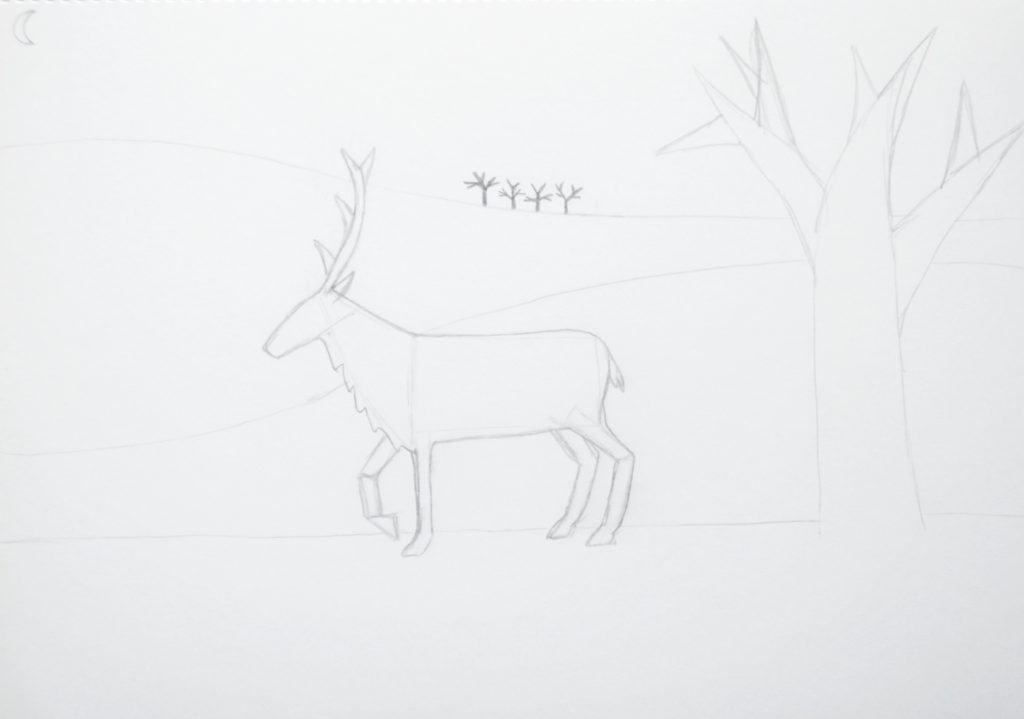
Step eight
I tidied up the lines of the tree at this point, and sketched out the areas I wanted to leave white when I coloured to represent the snow that collected in the branches. (Although as you’ll see, I later chose to colour over this.)
I also drew lots of tiny white circles very faintly on the page so I remember to leave them white too!
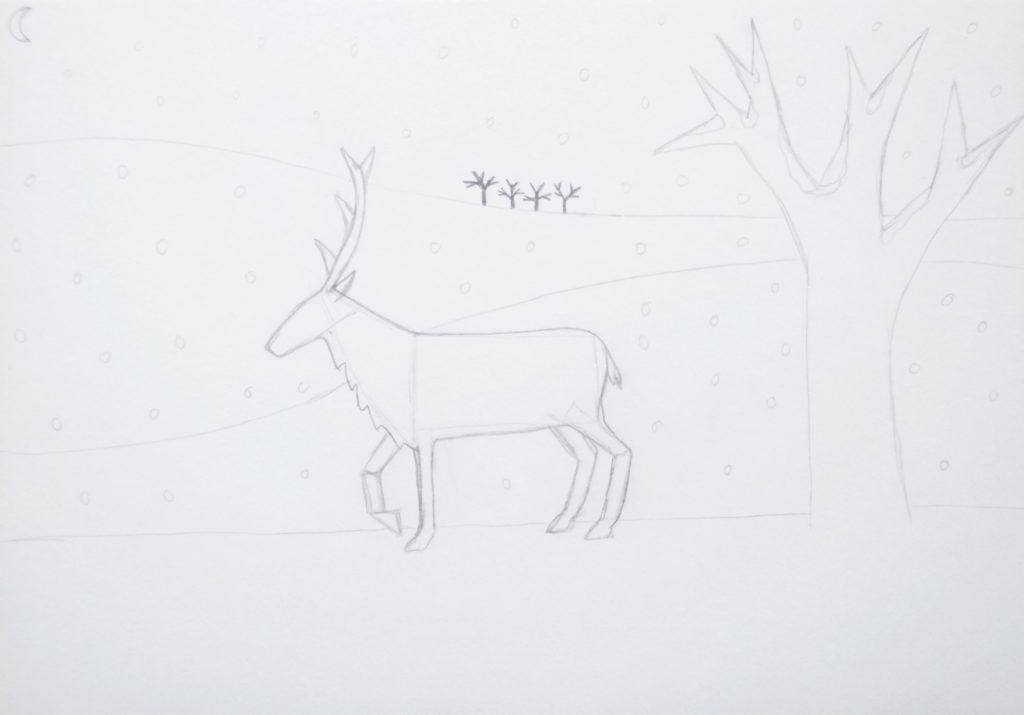
Step nine
Now it’s time to colour. Here’s how I coloured the picture if you want to do it the same:
- the bottom section stays white
- the stag and tree are coloured grey
- the next section up is light blue
- the section above that is medium blue
- the last section (the sky) is a very dark blue
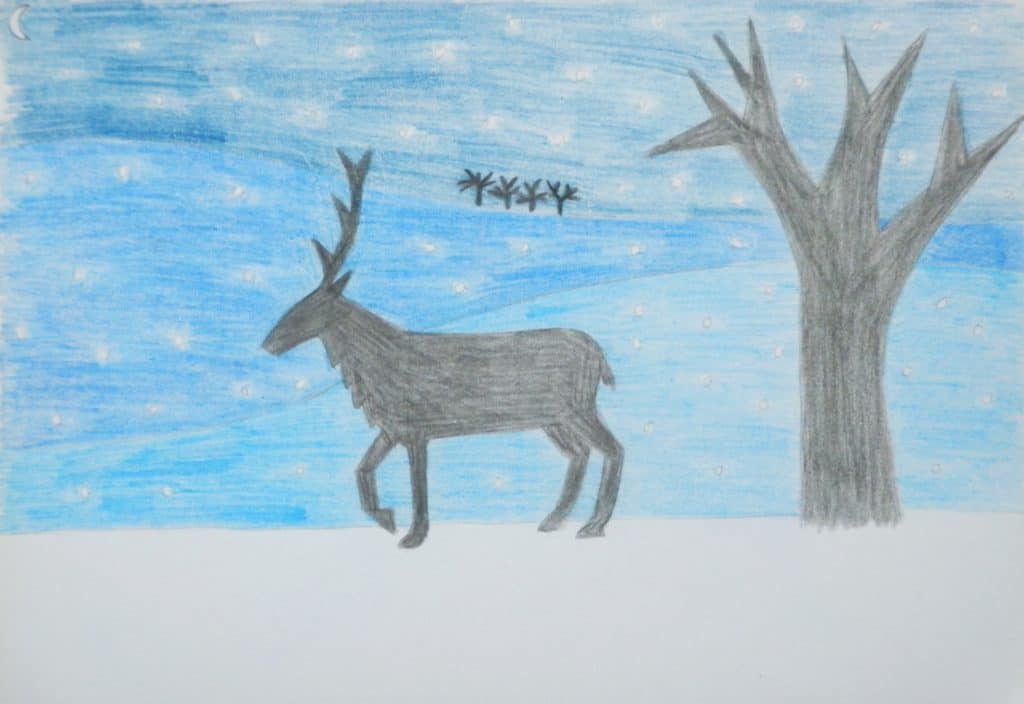
And your winter woodland scene is all done!
And for a wintery painting project try this: How To Paint A Winter Birch Tree Painting!
Sign up for my monthly emails of creative tips, tutorials and DIYs and get 31 free creative prompts!

You can unsubscribe at any time
About Stacey

I’m Stacey and I’m a blogger, abstract artist and freelance writer. My aim is to help busy people feel inspired and get more creative with tutorials, hints and tips.
I live in Cardiff with my partner and dog, and in my free time you’ll find me hiking, reading, painting or sampling a craft beer or two.

