
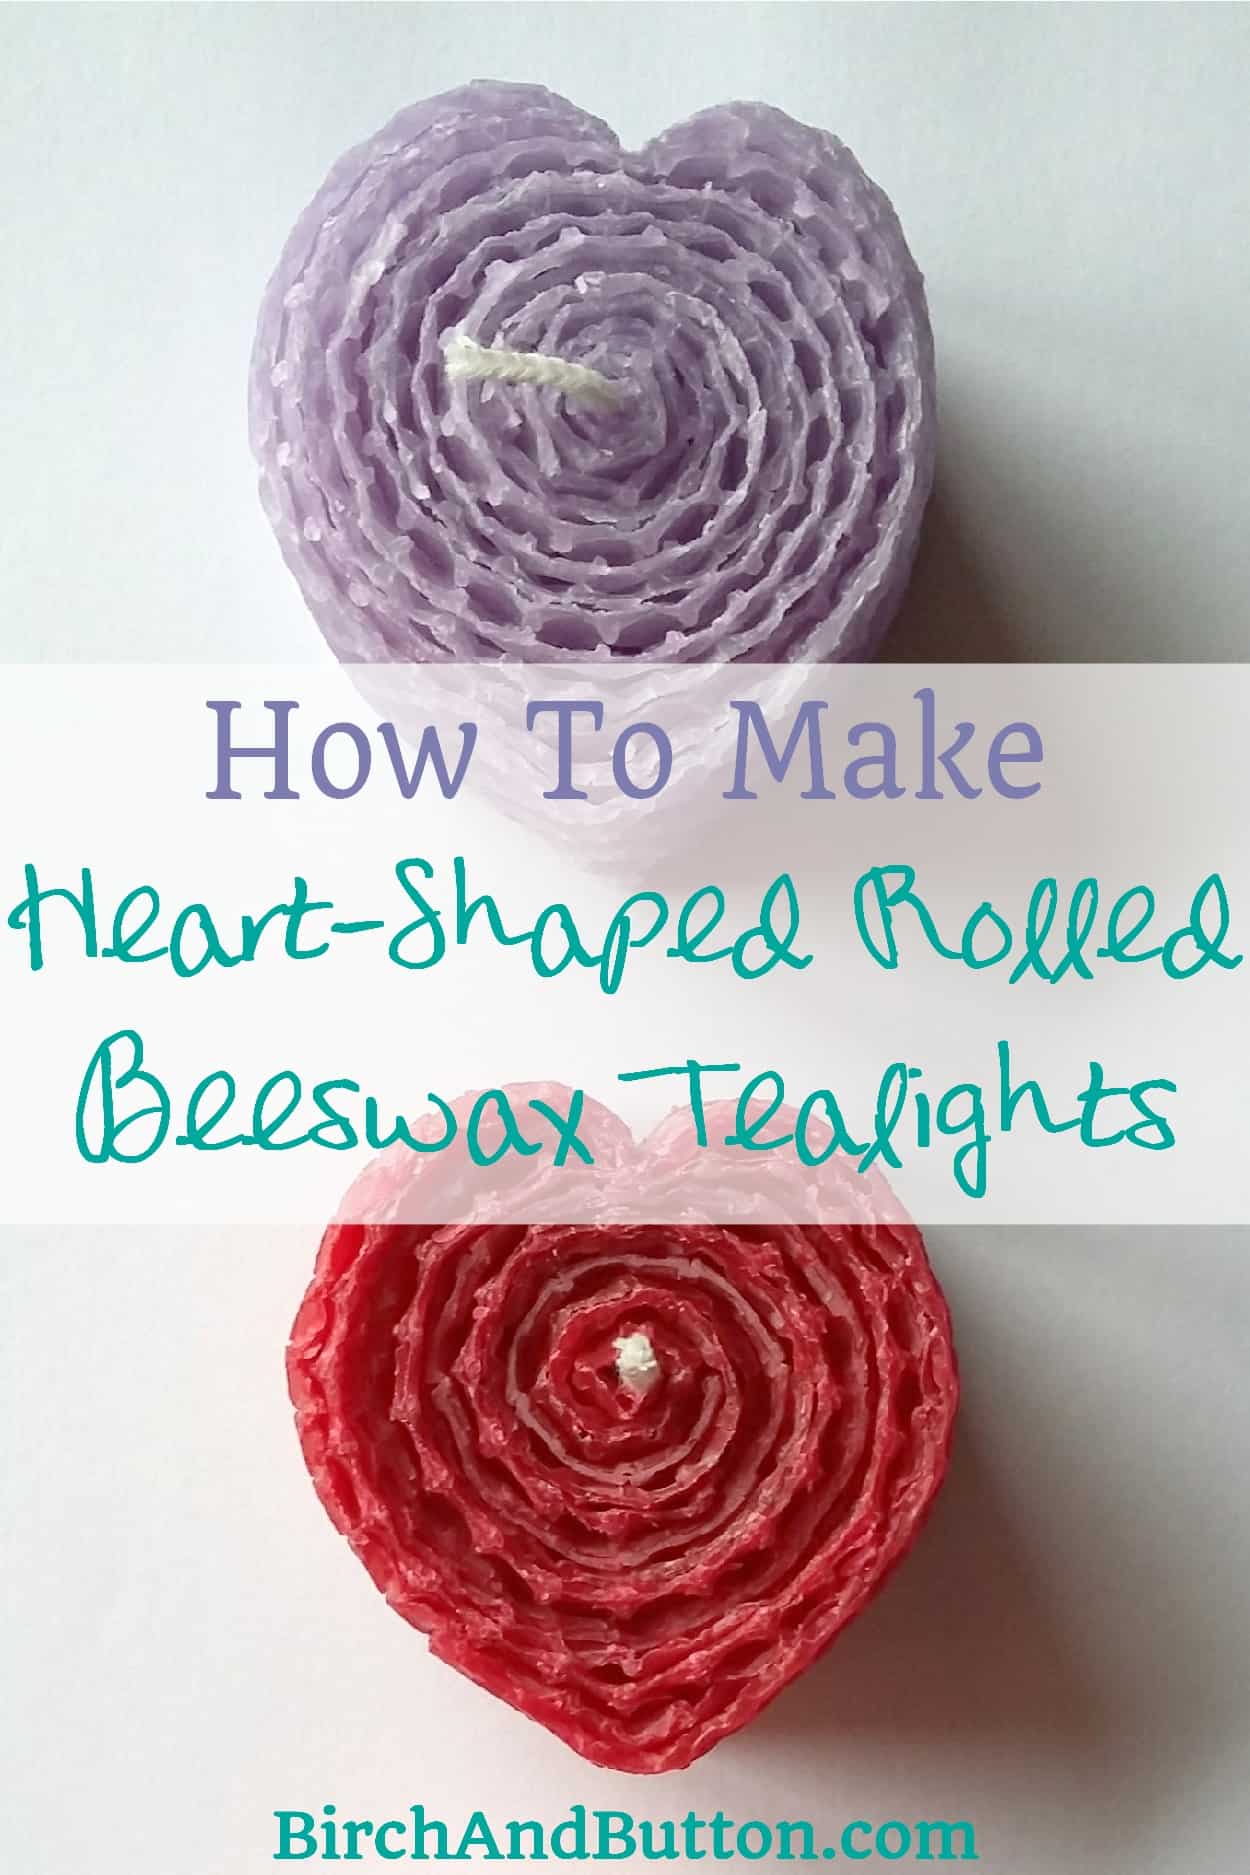
Today’s tutorial is for some really sweet heart-shaped beeswax tealights. They’re really easy to make as they’re rolled from beeswax sheets, so it’s the kind of thing you can do in front of the television if you like!
Beeswax sheets are really easy to work with but you should bear in mind that they can be brittle if they’re too cool.
The average room temperature should be fine, but if you keep your beeswax sheets somewhere cool like the garage or garden shed you should make sure you bring them into the house a couple of hours before you want to work with them.
TIP: If you store your beeswax sheets in a cool place and forget to bring them inside to warm up, a quick blast with a hairdryer should do the trick!
I like to work on a glass worktop protector when I’m using beeswax sheets and I normally pop it straight on my lap – that way the warmth from my legs makes the beeswax extra easy to work with.
As the beeswax warms up it can get a little tacky to the touch, so you’ll need to bear that in mind and protect your surfaces and clothes accordingly.
Anyway, let’s get on to how to make these little candles!

Sign up for my monthly emails of creative tips, tutorials and DIYs and get 31 free creative prompts!
You can unsubscribe at any time
How to make beeswax heart tealights
Supplies needed:
- Wicks
- Strips of beeswax, whatever colour(s) you like – I used 2 that were 16in long and 1in wide and 1 that was 8in long and 1in wide
Instructions
Step one
Place the wick at the very edge of one of the longer strips of wax and fold the wax strip as tightly around the wick as you can. This is the most fiddly bit, but it’s fine once you get started. 
Step two
As soon as the wax strip is wrapped around the wick once, place the other longer strip of wax on top, right up against the wick. Continue rolling tightly, making sure you keep the wax strips neatly aligned. If you find you aren’t rolling straight, you can easily unroll the wax strips and start again. 
Step three
When the candle looks a bit like the one in the picture below (in other words, you’ve rolled up about a quarter of the long strips), place the shorter strip on top and continue rolling. Make sure the roll stays as straight as possible. 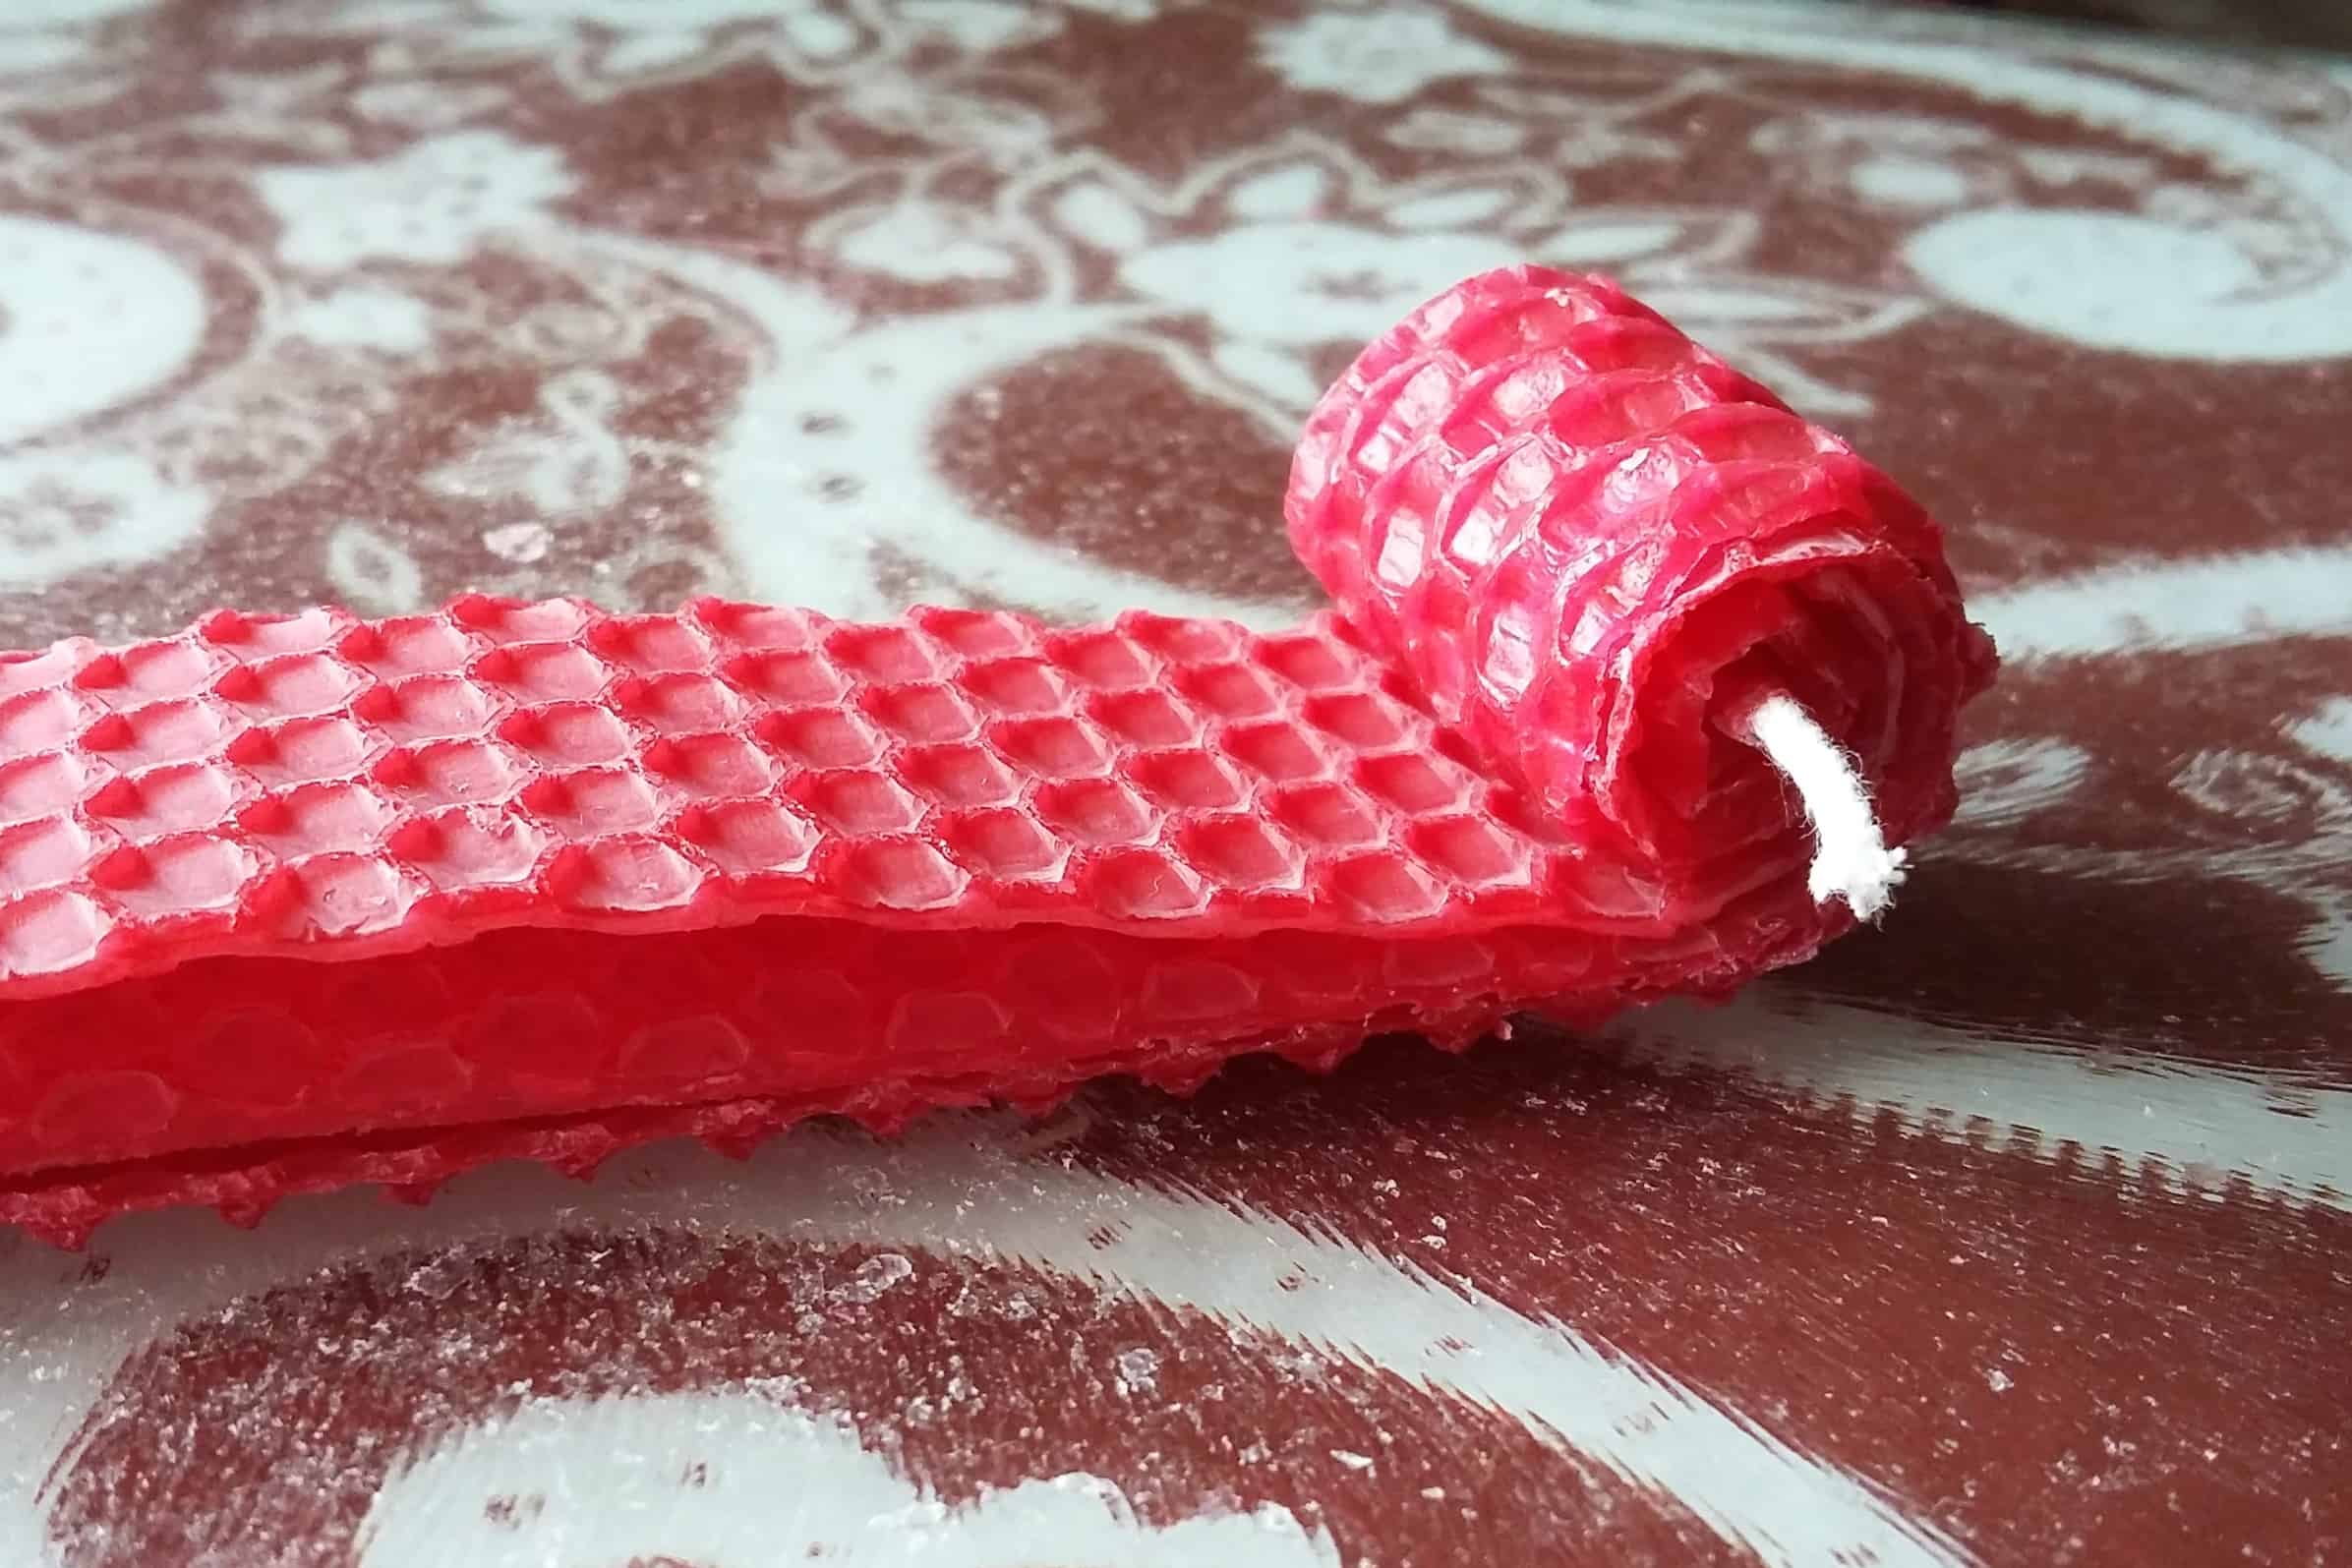
Step four
When you’ve rolled to the ends of the strips, push them into the candle so they don’t unravel. The heat from your fingers should be enough to do this. 
Step five
Now you should have a round beeswax tealight. You could leave it like this, but we’re making heart-shaped candles. It’s just a matter of shaping it now. I use my fingers to pinch the point of the heart and something like the edge of a ruler to push the top in and make the curved top. 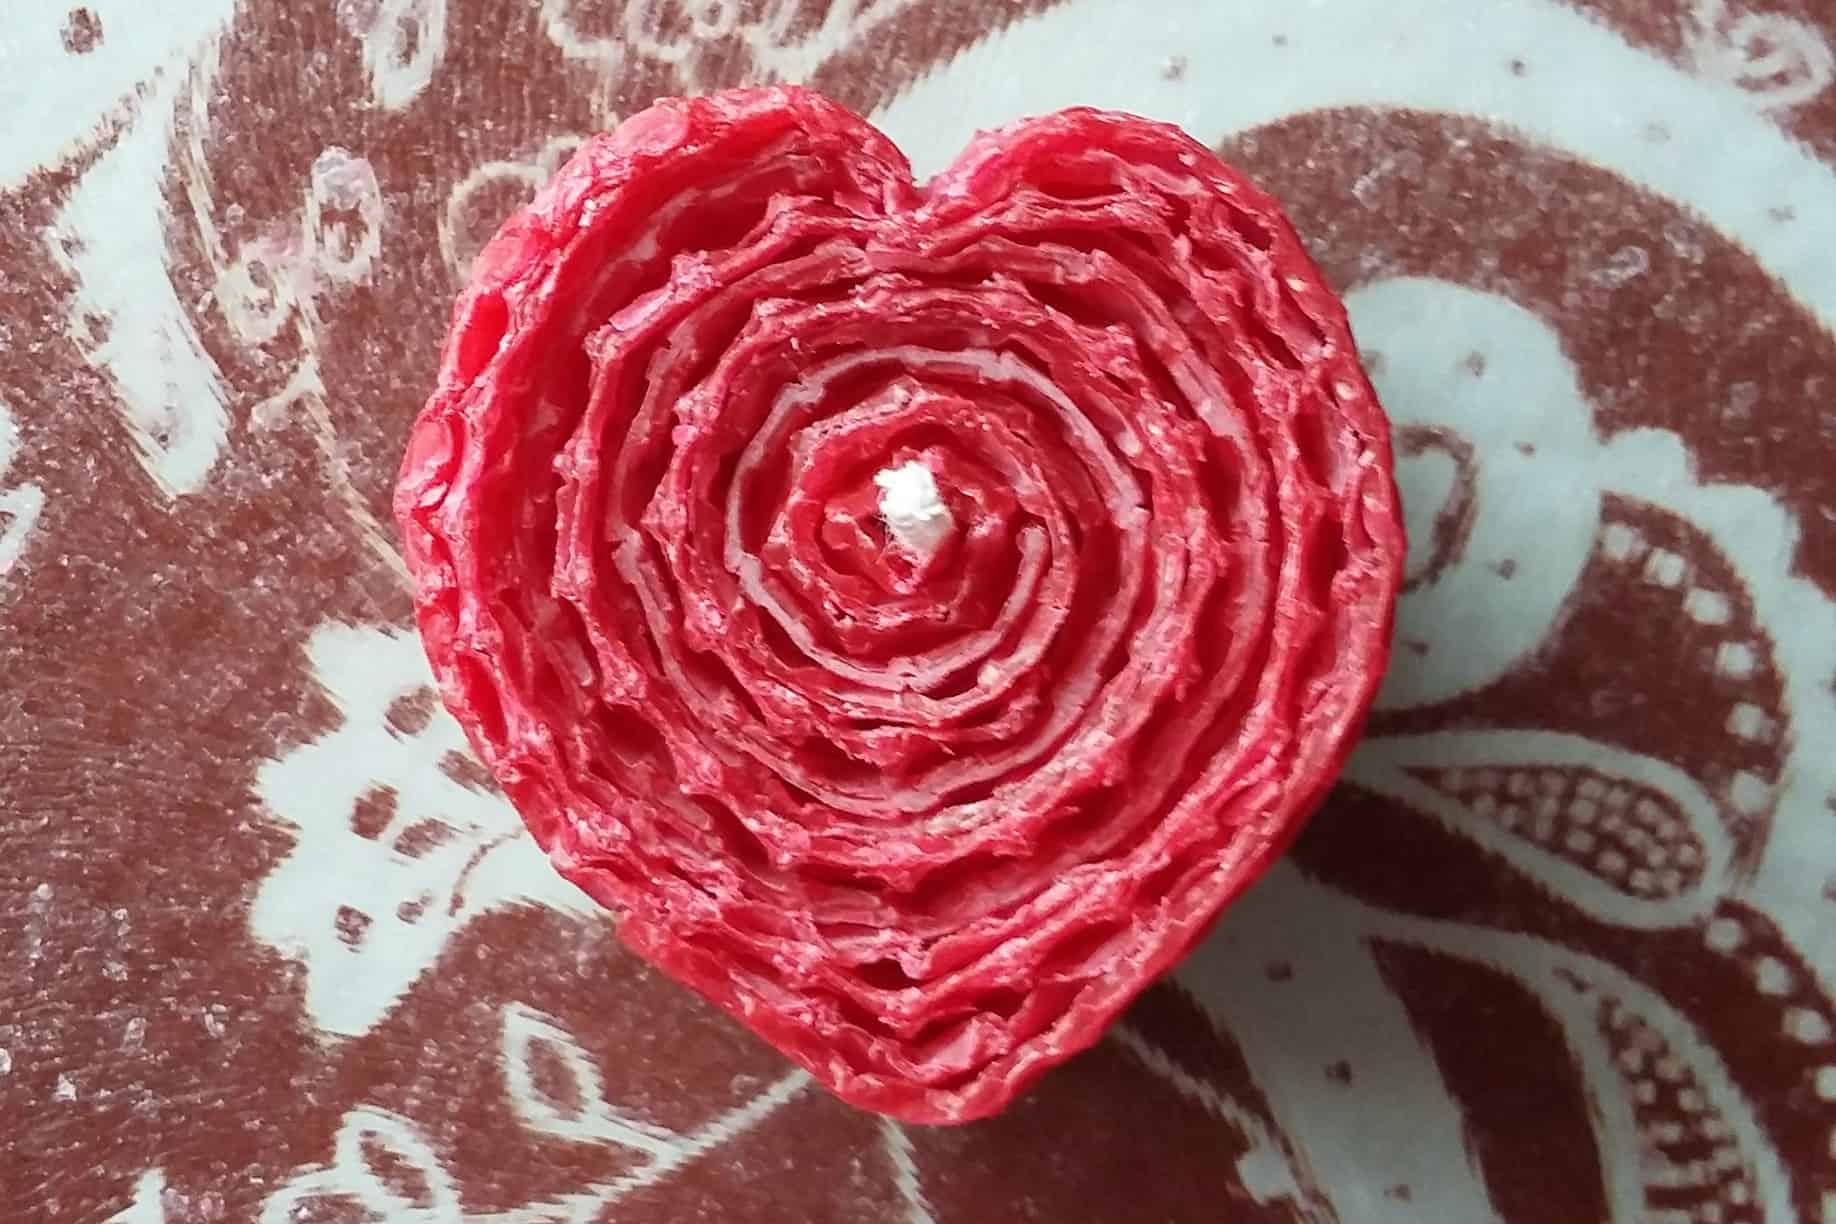
Then you’re all done and it’s ready to light! Just make sure you pop the candle into a tealight holder to protect your surfaces.
Burning your beeswax tealights
Before lighting, trim the wick so it’s no more than 0.5cm long.
It may seem like common sense, but there are a few rules to follow when burning candles to ensure you and those around you can enjoy your candle safely:
- Never leave a burning candle unattended.
- Keep a lit candle away from draughts and vibrations.
- Keep the candle out of reach of children and pets.
- Never burn your candle on or near anything that can catch fire.
- Trim wick to 5mm before lighting to prevent smoking or flickering flame.
- Keep candle free of any foreign materials, including matches and wick trimmings.
- Only burn the candle on a level, fire resistant surface.
- Do not burn the candle for more than 4 hours at a time.
About Stacey

I’m Stacey and I’m a blogger, abstract artist and freelance writer. My aim is to help busy people feel inspired and get more creative with tutorials, hints and tips.
I live in Cardiff with my partner and dog, and in my free time you’ll find me hiking, reading, painting or sampling a craft beer or two.