Make a unique piece of art for your wall or a background for a page in your art journal by making a collage from a quick and messy abstract painting. Read on for the steps to make your own abstract collage art!
So, let’s start with a confession: I came across a version of this project when I was browsing my Pinterest feed. It was designed for toddlers, but to be fair, I didn’t realise that at the time.
I was reading through the blog post that went with the project, thinking how fun it sounded, when I got to the bit about how it was a great way to get very young kids playing with paint.
Anyway, there’s no reason why kids should have all the fun… So that’s why I’ve created this particular project for you today!
This collage is great framed as a piece of wall art for yourself or as a gift, and it also makes for an interesting page in your art journal (which is what I did).

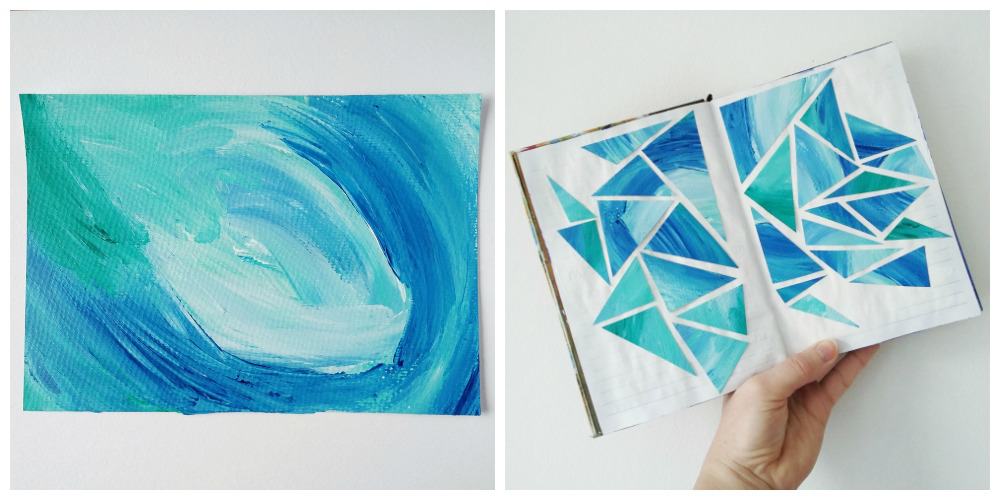
On the left is the initial painting I made, and on the right is the finished collage in my art journal!
Sign up for my monthly emails of creative tips, tutorials and DIYs and get 31 free creative prompts!

You can unsubscribe at any time
Making your abstract painting
The initial painting can be done in two ways — by finger painting or by using a paintbrush.
I went for the finger painting option because I love finger painting and think it’s a great technique to use in your artwork, but I know it doesn’t appeal to everyone.
If you decide to finger paint, I’d recommend you either use gloves or paints designed specifically for this purpose.
How to make abstract collage art
I recently (May 2022 in fact…) recreated this project so I could make a video showing the process. Here it is:
Supplies needed:
- Different colours of paint (The acrylic paints I used in the video above are Pebeo Studio Acrylics in Turquoise Blue, Pebeo Studio Acrylics in Prussian Blue Hue and Daler Rowney Graduate Acrylic Paint in Titanium White)
- Paintbrush (optional)
- Gloves if finger painting
- Thick paper to paint on (In the video, I used a sheet from my Canson XL Mixed Media pad)
- Scissors
- Craft glue
- Your art journal, or another sheet of paper to mount the collage (In the video, I used my Fabriano Venezio sketchbook)
- A frame if you’re making wall art
Step one
Make a messy, abstract painting. Either use your fingers or a paintbrush and swipe the colours across the page, letting them blend a little here and there but not worrying too much about the end result. Leave this to dry.
- Related: Easy Abstract Acrylic Painting DIY

Step two
Cut the dry painting into shapes. Triangles are a great option as they’re easy and quick to cut out, but it’s entirely up to you what shapes you do. Try to make sure the shapes aren’t all uniform in shape and size.
Step three
Rearrange your painted shapes on another sheet of paper, or in your art journal. I chose to leave a small gap around each piece and kept the shape of the collage pretty abstract.
When you’re happy with the way they go together, glue them in place and leave until the glue is dry.

Step four
If you’re making your piece into wall art, now is the time to frame it. Otherwise, if it’s in your art journal, you may want to add a layer of Mod Podge or PVA glue (I think that’s Elmer’s glue in the US but I’m not 100% sure) with a few drops of water added, just to make sure the corners all stay stuck in place.
Then you’re all done!
I really hope you enjoy this fun and messy exercise to make your own abstract collage art. Different mediums and surfaces will give different effects, so get stuck in and see what you can create!
About Stacey

I’m Stacey and I’m a blogger, abstract artist and freelance writer. My aim is to help busy people feel inspired and get more creative with tutorials, hints and tips.
I live in Cardiff with my partner and dog, and in my free time you’ll find me hiking, reading, painting or sampling a craft beer or two.

